Hey Everyone :)
I wanted to share a couple of great websites and apps that I use to stay organized at school.
1. Evernote
I cannot say enough good things about this app & website! I used to be one of those people who had about a thousand sticky notes all over my desk and wall, and at home, all over my nightstand. My sticky notes contain to-do lists, info I will need soon, etc. With Evernote, I pretty much rarely use sticky notes any more!
This makes me happy for 2 reasons: 1. I felt really bad for using all of that paper just to throw it away later when my to-do list was completed. Totally not sustainable. 2. This year I am at two different schools, and I would have to carry all of those sticky notes with me. Not sustainable either!
Another reason Evernote is so great is because I keep a tab open on my browser all day on my work computer next to my email tab. This way I can add to my to-do lists or delete from them when an item is done quickly.
The final reason I love Evernote is because they have an app! Anytime I am at home and I remember something I need to add to my school to-do list, I can add it right then and there from my smartphone or iPad! I used to either text it to my email or write it on my notes app and email it to myself. This saves time and is way easier!
You can organize Evernote in a lot of great ways. I have one "notebook" for school lists, and one "notebook" for home lists. I use this app & website daily! Want to be more organized easier and go paperless for those to-do lists? Get Evernote!
2. PlanBook
I came across Planbook a few years back, but was broke beyond broke and couldn't even afford the $12 per year for the membership. I ended up creating an Excel Lesson Plan sheet (and a couple of other variations on Excel) that kind of mimic the idea of Planbook.
This year I finally purchased a year subscription to Planbook for $12, and could not be happier! You can create your own customized schedule, type up lesson plans, add in Common Core Standards (from a drop down list!), and assign homework all from the website or app!
The amazing thing about the homework portion is that you can put the link to that class' homework on your website, and whatever you put in your Planbook for homework will show up when the student clicks on it. No double work for assigning homework!
It also saves your lessons from year to year, and if you are out and have a sub, all you have to do is print the day's plans! :)
Another great thing about Planbook is that they have an app! You can write lesson plans and assign homework from your smartphone or iPad! That rocks!
You can get a 1 month FREE trial of Planbook. I really liked that even though I purchased it halfway through the trial month, they still gave me the free month- so I didn't lose any of my free month by purchasing it early- I like that :)
Let me know what you think about these websites. What other websites & apps do you use to stay organized?
:) Ashley
Showing posts with label Teacher Organization. Show all posts
Thursday, September 11, 2014
Saturday, August 9, 2014
Tidy Tubs- Help with Managing Paper Scraps!
I LOVE classroom organization! :)
I am forever searching the Internet to see what other organizational gems I can glean from other teachers. Today I came across something AMAZING! They are called Tidy Tubs!
Basically, whenever you have students doing a project where they are cutting any kind of paper (like for Interactive Notebooks, projects with magazines, etc), you give each group a tub of some sort that will be used for them to place their scraps in as they are cutting. This way, they keep their work area from getting cluttered and they are not going back and forth from the two trash cans in your room the entire time.
This is GENIUS! I've always struggled with how to keep from going insane with the mess during these projects, but now I feel like I have a real solution! :)
Check out the original post on Tidy Tubs HERE from Rowdy in Room 300. I teach older students and will still use the idea with them, but I probably won't make the baskets as cutesy :) HERE is another great example of the Tidy Tubs from another teacher over at What the Teacher Wants. (ps- her classroom photos are awesome!)
Hope this helps you-all as much as it did me!
Have a great day,
Ashley :)
I am forever searching the Internet to see what other organizational gems I can glean from other teachers. Today I came across something AMAZING! They are called Tidy Tubs!
Basically, whenever you have students doing a project where they are cutting any kind of paper (like for Interactive Notebooks, projects with magazines, etc), you give each group a tub of some sort that will be used for them to place their scraps in as they are cutting. This way, they keep their work area from getting cluttered and they are not going back and forth from the two trash cans in your room the entire time.
This is GENIUS! I've always struggled with how to keep from going insane with the mess during these projects, but now I feel like I have a real solution! :)
Check out the original post on Tidy Tubs HERE from Rowdy in Room 300. I teach older students and will still use the idea with them, but I probably won't make the baskets as cutesy :) HERE is another great example of the Tidy Tubs from another teacher over at What the Teacher Wants. (ps- her classroom photos are awesome!)
Hope this helps you-all as much as it did me!
Have a great day,
Ashley :)
Tuesday, April 15, 2014
How I Stay Organized- A Peek at My Organizational Binders
I love to be organized!! I think that without organization,
there’s no way I’d be able to teach.
Some people keep everything on their computers- and while I
do keep all of my files on my computer- I also like to have a hard copy of
things as well- I think this stems from my deep mistrust of computers. I always think back to Skynet and the
Terminator movies ;)
But in all seriousness, I do love to keep a hard copy- this
way I don’t have to be logged in to my computer to access all of my data. And until our school systems and teachers are
all doing everything online, there will be hard copies of things you will have
to keep track of.
I do love to create my own binder covers and make them fun-
I’m going to have to look at them daily for the next 9 months, so I need them
to make me happy! I created several
binder covers (and the matching spine labels- you can’t have a cover without a
matching spine label!) that have helped me IMMENSELY throughout the last few
years, and now I want to share with you how I organize my teaching life.
Binder #1- The
Teacher Organization Binder
I could not live my day-to-day life without this
binder. I literally use it every
day! The sections in this binder are:
To Do Lists- A
page for my sticky-notes of my to-dos
Info Lists- Class
Lists, Photo Release Lists, Approved Parent Volunteer Lists, etc.
Calendar- A copy
of the school calendar- where I write all important dates and meetings down.
Year Long Plans-
A copy of our district’s year long plans, broken down by quarter.
Common Core Checklist-
A list of all of the year’s Common Core objectives.
IEP Info- A quick
reference list of my IEP student’s modifications and needs.
Lesson Plans- A
copy of each week’s lesson plans. (I have these templates in my TPT store!)
Meeting Notes- A
place to put any notes from school or parent meeting notes- I always know where
my notes are- it has come in handy more than a few times!
PLT Meeting Notes-
A place to keep notes and records of PLT meetings.
Student Info- I
keep a list of my student’s parent contact info here and any allergy info as
well.
Lent & Borrowed
Items List- A place to keep track of who you’ve lent things to- and who you
borrowed stuff from… trust me, you’ll forget if you don’t write it down!
Now I know many of you, like myself have an online gradebook
that you use for all of your grading during the quarter. However, as wonderful as online gradebooks
are, there is always the risk that the data you inputted may not be there
later.
Each quarter, I print my final gradebook so that I have a
printed record of each student’s grades throughout the quarter, and this also
makes it so much easier when speaking with a parent in a conference to be able
to show them their child’s grades in print.
I also keep track of homework and morning work in a separate
section of my gradebook.
This binder is essential.
I have a page for each student in this binder (pictured above) with their name at the
top. Any time I have to contact their
parent (with the exception of email), I make a quick note of the date and time
I spoke with them or sent them a letter or a discipline referral. I also write down if they’ve contacted me
with a note or a phone call, and will insert the note in the binder behind that
child’s paper.
This helps out so much if you need to go back and check your
records if a parent has a concern. I do
not keep track of emails sent and received from parents, because I send and
receive about 20-30 parent emails each day.
And I save every email I send and receive so that I have a record of
those. There is no need to write these
down, in my opinion.
I am mainly a reading teacher, so I like to keep good
records on my students. Here are the
tabs in my Reading Binder:
Assessment Info-
Benchmark testing data (ie: mClass scores, DRA scores, etc)
Reading Levels- A
list of the reading levels of the students in my classroom.
Meeting and
Conference Planning- a monthly calendar where I write which students I will
be meeting with on what days.
Conference Ideas-
Ideas for individual meetings with students and what they need to work on.
Book Clubs- a
place to keep the meeting checklists and work from student book clubs I’ve met
with each week.
Student Data- any
other info or data on my students that I feel is important.
Anecdotal Notes and
Labels- a place to keep address labels so that I can jot down something
quickly about the student and put it on their conference sheet.
I love when my students are thoughtful enough to take the
time to write me a note or draw me a picture.
But if you’re like me, once you put one drawing up, 10 more students
have drawn you something to put up as well.
As sweet as this is, after awhile, your wall is littered with
drawings. When do you take them down? Do
you throw them away after you have?
I saw this idea and I put it into place last year- and I
LOVE IT!! I made a “Notes for My
Teacher” binder, and put clear plastic protector sheets in it. Any time a student draws me a picture or
writes me a note, I make a big deal about it, thank them for it and tell them I
am putting it in my special notes binder.
I do it in front of them so that they know I am keeping it. It still makes them feel special, and you do
not have a wall of drawings falling off every day.
Also, at the end of the year, you can go through and clean
out that binder and use it again next year.
If a student spent a lot of time on something or you have something
sentimental in the binder you can keep it instead of wondering where it
went.
I hope this peek into my organizational binders has
helped! I urge you to create your own
binders (or revamp the ones you currently have) to help keep yourself
organized.
I have all of the above mentioned binder covers will be for sale soon in
my Teachers Pay Teachers Store individually and I am selling them as a pack
together (for a discounted price). Visit
my store if you’d like to see these guys!
Have a great day,
Ashley J
Friday, July 27, 2012
Lost Tooth Envelopes
Happy Friday!! Only a few more Fridays of summer left! I have been busy working on stuff for my classroom and I want to share with you one of my new favorite projects I've created!
I've always had the problem of students loosing teeth in my classroom. It doesn't happen all of the time, but it occasionally does. Then I have to send them to the nurse to get an envelope so they can take their tooth home.
I dislike the interruption and the fact that the student is missing out on class time. What if the nurse is busy and can't see my student for a few minutes? So this year, I've decided to have some "Lost Tooth" envelopes to keep in my classroom in case this situation arises. (Now, of course I will let them go to the restroom to rinse out their mouth, etc.) But I will no longer have to send them to the nurse to get something to hold their tooth in!
I searched and searched the internet for a "cool" tooth envelope (due to the fact that my kids are in 5th grade), but couldn't find one.... so I decided to make some of my own! :) I really dig these and think they are pretty cool!! :) Plus, they are small, so that the older kids can just slip them in their pocket and not have to worry about carrying something around all day.
I am sharing my lost tooth packets with you today! :) Just click on the link below to grab the freebie! I also have posted a tutorial below on how to put them together... you may not need it... I just hate following directions and would rather see pictures! :) Enjoy!
I've always had the problem of students loosing teeth in my classroom. It doesn't happen all of the time, but it occasionally does. Then I have to send them to the nurse to get an envelope so they can take their tooth home.
I dislike the interruption and the fact that the student is missing out on class time. What if the nurse is busy and can't see my student for a few minutes? So this year, I've decided to have some "Lost Tooth" envelopes to keep in my classroom in case this situation arises. (Now, of course I will let them go to the restroom to rinse out their mouth, etc.) But I will no longer have to send them to the nurse to get something to hold their tooth in!
I searched and searched the internet for a "cool" tooth envelope (due to the fact that my kids are in 5th grade), but couldn't find one.... so I decided to make some of my own! :) I really dig these and think they are pretty cool!! :) Plus, they are small, so that the older kids can just slip them in their pocket and not have to worry about carrying something around all day.
I am sharing my lost tooth packets with you today! :) Just click on the link below to grab the freebie! I also have posted a tutorial below on how to put them together... you may not need it... I just hate following directions and would rather see pictures! :) Enjoy!
(for some reason when you view the file in Google Docs, some of the envelopes look messed up... but when you download the PDF, they are fine! I have no idea why they look messed up on Google Docs!)
Tutorial:
Step 1:
Print desired Lost Tooth envelopes & cut out. (Note: Printing the black & white ones on colored paper gives it a little more panache :)
Step 2:
Flip the envelope over and fold all of the tabs toward the back side.
Step 3:
Put one dot of glue on the bottom tab right next to the small right tab (if you are looking at it from the back side).
Step 4:
Fold the small right side tab over the bottom tab and press where you put the dot of glue.
Step 5:
Put small dots of glue along the bottom and right side tabs. (careful! do not over-glue!)
Step 6:
Press the large left-side tab down onto the dots of glue. Press and hold for about 20 seconds where all of the glue spots were.
Finished Product: (the picture is poor quality, but it's pretty cool, eh?!)
Names:
I left all of the top tabs of the envelopes blank with no graphics so that you or your students could write their name on it in that space. That way if the envelope gets lost somewhere in the school, they will know who to send it to! :) P.S. I plan to tape mine shut after they put in their tooth.
For Younger Students:
If you are afraid of your little ones loosing their tooth envelopes, you might want to put in the tooth, tape it shut and then put a hole punch through the top and attach a piece of yarn so that they can wear it as a necklace. Just make sure they are a student that can handle that and won't get into trouble or hurt themselves (or someone else) with it ;)
Hope you enjoy these!
:) Ashley
-------------------------------------
P.S. Did you know that I started my own company, Camp Partridge?
⛺️ Camp Partridge offers online camps for children and teens ages 10-16 who want to be digital creators and authors!
⛺️ Camp Partridge offers online courses for parents struggling with remote learning.
⛺️ Camp Partridge offers resources for your classroom!
I would be honored if you would share Camp Partridge with people you know who need or would enjoy our camps and courses! 🧡
Thursday, July 12, 2012
Make sure you get the FREE stuff!
I know I posted a few days ago about the Clutter Free Classroom's daily flash freebies for the month of July & August. If you missed it-I want to make sure you know about all of the awesome goodness going on over on her blog! EVERY DAY in July & August, she is sharing a tip of how to organize your classroom AND giving away a FREEBIE she designed to help with the orgainzational process.
Let me tell you that these are AWESOME! I've pretty much downloaded everything she's shared! The only catch is that they are only free for ONE DAY. You have to visit her blog every day to see what new goodness she is sharing. Otherwise you will have to purchase the items from her Teachers Pay Teachers Store... which is still not a bad deal for what she has created. But I want you to get them for free too! Make sure you visit her blog every day! The link is below! :)
Happy landings,
Thursday, July 5, 2012
Missing Assignments
Happy Thursday everyone! :) I hope that you had a wonderful 4th!
Today I want to tell you about what to do with Missing Assignments. You know you will have those few students who have chronic problems with missing assignments. I know I always seem to. And everything I've tried so far hasn't worked as well as I wanted to.
Last year my school used a computer-based grade book where you had the option to be able to print missing assignment reports for each student. I tried to do this each week and send it home in their Friday Folders. Then, their parent would have to sign it and return the paper, so they would at least know that their child was missing an assignment. This method was very helpful for some of my students who just forgot or didn't want to finish their assignments.
The only problem with this method is that sometimes I wasn't able to update grades in the computer each week...then it was like 2 weeks before they got the missing assignment report. Another teacher in our building would look through all of the papers right after they were turned in and then just enter "missing" into the computer so that she could make sure she had her reports up to date each week. Then she would go back and enter grades at a later date.
I feel confident this year that I will be able to keep up with my grading each week because of the grading plan that I've set up for myself. Also by using the Paper Drop system, everything will be so much more organized!
Missing Assignment Alerts
This year, because I'm using the Paper Drop system in my classroom, after an assignment is turned in, I will simply be able to look at the back of the envelope and see which students are missing assignments. I will then call them up and have them take one of my MISSING ASSIGNMENT ALERT notes and have them write their name on my Missing Assignment Alert Clipboard. They will have to fill in the applicable parts and then take it home to their parents. Their parents will read it and sign it and the student will return it the next day. This slip is just a reminder for the student to turn it in by the next day, and it is also a notice to the parents that their child has not turned in an assignment. That way, the parents know THE DAY the assignment didn't get turned in, and it gives the student an opportunity to finish the assignment and turn it in.
I have them sign my clipboard because the next day I will ask them if they have the slip to give to me. If they do not have the slip, then I will personally call or email their parents to see if they read the slip and know that their child has a missing assignment. Please know that this piece of the system is IMPERATIVE. If you don't receive the slip, you MUST call their parents. Otherwise students will not take your system seriously and think you are making idle threats about doing things. It will also help them to not want to have missing assignments and thus makes your job easier! :)
I am also excited about using this system because then I won't have to spend time each Thursday night preparing Missing Assignment Reports!
You can snag a copy of the a PDF of the Missing Assignment Alert and Clipboard List, as well as an EDTABLE plain text Word version of the Missing assignment alert on Teachers Pay Teachers for only $1.50!
Today I want to tell you about what to do with Missing Assignments. You know you will have those few students who have chronic problems with missing assignments. I know I always seem to. And everything I've tried so far hasn't worked as well as I wanted to.
Last year my school used a computer-based grade book where you had the option to be able to print missing assignment reports for each student. I tried to do this each week and send it home in their Friday Folders. Then, their parent would have to sign it and return the paper, so they would at least know that their child was missing an assignment. This method was very helpful for some of my students who just forgot or didn't want to finish their assignments.
The only problem with this method is that sometimes I wasn't able to update grades in the computer each week...then it was like 2 weeks before they got the missing assignment report. Another teacher in our building would look through all of the papers right after they were turned in and then just enter "missing" into the computer so that she could make sure she had her reports up to date each week. Then she would go back and enter grades at a later date.
I feel confident this year that I will be able to keep up with my grading each week because of the grading plan that I've set up for myself. Also by using the Paper Drop system, everything will be so much more organized!
Missing Assignment Alerts
This year, because I'm using the Paper Drop system in my classroom, after an assignment is turned in, I will simply be able to look at the back of the envelope and see which students are missing assignments. I will then call them up and have them take one of my MISSING ASSIGNMENT ALERT notes and have them write their name on my Missing Assignment Alert Clipboard. They will have to fill in the applicable parts and then take it home to their parents. Their parents will read it and sign it and the student will return it the next day. This slip is just a reminder for the student to turn it in by the next day, and it is also a notice to the parents that their child has not turned in an assignment. That way, the parents know THE DAY the assignment didn't get turned in, and it gives the student an opportunity to finish the assignment and turn it in.
I have them sign my clipboard because the next day I will ask them if they have the slip to give to me. If they do not have the slip, then I will personally call or email their parents to see if they read the slip and know that their child has a missing assignment. Please know that this piece of the system is IMPERATIVE. If you don't receive the slip, you MUST call their parents. Otherwise students will not take your system seriously and think you are making idle threats about doing things. It will also help them to not want to have missing assignments and thus makes your job easier! :)
I am also excited about using this system because then I won't have to spend time each Thursday night preparing Missing Assignment Reports!
You can snag a copy of the a PDF of the Missing Assignment Alert and Clipboard List, as well as an EDTABLE plain text Word version of the Missing assignment alert on Teachers Pay Teachers for only $1.50!
Cary on bravely,
-------------------------------------
P.S. Did you know that I started my own company, Camp Partridge?
⛺️ Camp Partridge offers online camps for children and teens ages 10-16 who want to be digital creators and authors!
⛺️ Camp Partridge offers online courses for parents struggling with remote learning.
⛺️ Camp Partridge offers resources for your classroom!
I would be honored if you would share Camp Partridge with people you know who need or would enjoy our camps and courses! 🧡
Monday, July 2, 2012
FREE STUFF
I am a fan of FREE STUFF. We teachers work hard all the time and spend oodles of our own money on our classroom. So I love it when someone is willing to share awesome free stuff with the rest of us. (Honestly that's the main reason I started this blog...to share it forward with my fellow colleagues!)
Anywho, down to the FREE STUFF! The Clutter-Free Classroom's blog will be sharing classroom organization and management tips each weekday during July & August. And not only that, but they are going to have a FREE download each weekday during July & August as well! How awesome is that?!? But, you have to visit their site EACH day... the download will only be free for one day. After that it will be available for purchase from their TPT store.
So make sure you check out the Clutter Free Classroom every day in July & August!
Have a wonderful day!
Friday, June 29, 2012
The Paper Drop System
Good afternoon! :)
Today's post also has to do with grading. When I taught Middle School specials classes, I just used the tray system. I didn't have many papers to grade and that worked well for me. So, I thought I would try the same system out with my 4th graders. ....Let's just say it didn't work out as I had planned! Here is what my trays looked like:
Looks decently organized, right? Yeah... this was on a good day. I labeled each tray with the name of the subject (using a Sharpie and some masking tape). The problem with this system was, if students turned in more than one assignment to the tray before I collected it, then I had to sort through several assignments work of papers and divide them into their individual assignment piles before I could even grade them! This took so much longer... and then sometimes you would find a rogue paper that got turned in later in another assignment pile.
Part of my problem was that I did not have a grading system. Yesterday's post talked about my plan for this year and grading. Check it out HERE if you missed it. So the last couple of months I've been searching for a different system that would work better and keep me and the students more organized.
The solution? Laura Candler's Paper Drop System! I cannot sing the praises of Laura Candler enough! She is amazing! You totally have to check out her website. Seriously. Don't wait. Just do it! She has so many great ideas and freebies for teachers. She has also written a number of books and has other things for sale at the TPT website.
Basically, you use 9x12 brown clasp envelopes. She has a free printable page you will glue on the front and back of the envelopes. Then you laminate the entire envelope. You will need to create quite a few envelopes. (I plan on creating enough envelopes to hold an entire week's worth of assignments for each subject.)
When you collect an assignment, you put all the papers in one envelope, (with a wet-erase marker) write the assignment's name on the front and check off any students who haven't turned in their work on the back of the folder. Close the envelope with the clasp and keep in a place for grading at a later time. This way ALL of the papers from one assignment are in ONE place. You will know who turned stuff in late, and who is missing each assignment at a quick glance. How awesome is that?!? I can't wait to use the Paper Drop System in my classroom! I know it will help me out so much with my grading and organization.
The best thing about the Paper Drop System is that it is totally FREE! Woot Woot! I loves me some free stuff! Click HERE for a free download of her Paper Drop System.
I also found a really cool idea on Pinterest the other day:
but it is actually from the Better Homes and Gardens Website.
Here's another version of the same thing: http://pinterest.com/pin/167829523584004285/
My Idea:
I am planning on creating one of these to organize my Paper Drop Envelopes. This way, all of the envelopes will be in one place and will be organized! I think it will work awesome!
How about you? How do you collect student's papers? What have you tried that's worked?
For Strength & honor,
Today's post also has to do with grading. When I taught Middle School specials classes, I just used the tray system. I didn't have many papers to grade and that worked well for me. So, I thought I would try the same system out with my 4th graders. ....Let's just say it didn't work out as I had planned! Here is what my trays looked like:
Looks decently organized, right? Yeah... this was on a good day. I labeled each tray with the name of the subject (using a Sharpie and some masking tape). The problem with this system was, if students turned in more than one assignment to the tray before I collected it, then I had to sort through several assignments work of papers and divide them into their individual assignment piles before I could even grade them! This took so much longer... and then sometimes you would find a rogue paper that got turned in later in another assignment pile.
Part of my problem was that I did not have a grading system. Yesterday's post talked about my plan for this year and grading. Check it out HERE if you missed it. So the last couple of months I've been searching for a different system that would work better and keep me and the students more organized.
The solution? Laura Candler's Paper Drop System! I cannot sing the praises of Laura Candler enough! She is amazing! You totally have to check out her website. Seriously. Don't wait. Just do it! She has so many great ideas and freebies for teachers. She has also written a number of books and has other things for sale at the TPT website.
Basically, you use 9x12 brown clasp envelopes. She has a free printable page you will glue on the front and back of the envelopes. Then you laminate the entire envelope. You will need to create quite a few envelopes. (I plan on creating enough envelopes to hold an entire week's worth of assignments for each subject.)
When you collect an assignment, you put all the papers in one envelope, (with a wet-erase marker) write the assignment's name on the front and check off any students who haven't turned in their work on the back of the folder. Close the envelope with the clasp and keep in a place for grading at a later time. This way ALL of the papers from one assignment are in ONE place. You will know who turned stuff in late, and who is missing each assignment at a quick glance. How awesome is that?!? I can't wait to use the Paper Drop System in my classroom! I know it will help me out so much with my grading and organization.
The best thing about the Paper Drop System is that it is totally FREE! Woot Woot! I loves me some free stuff! Click HERE for a free download of her Paper Drop System.
I also found a really cool idea on Pinterest the other day:
but it is actually from the Better Homes and Gardens Website.
Here's another version of the same thing: http://pinterest.com/pin/167829523584004285/
My Idea:
I am planning on creating one of these to organize my Paper Drop Envelopes. This way, all of the envelopes will be in one place and will be organized! I think it will work awesome!
How about you? How do you collect student's papers? What have you tried that's worked?
For Strength & honor,
Wednesday, June 27, 2012
Creating a Grade Book
Howdy everyone!
So today I am going to talk about thedread wonder that are Grade Books! Yea!! Ok...so I am trying to put a positive spin on something that a lot of us dread... grading. I am going to share what I did in my classroom, and how I plan to modify that this year in my classroom.
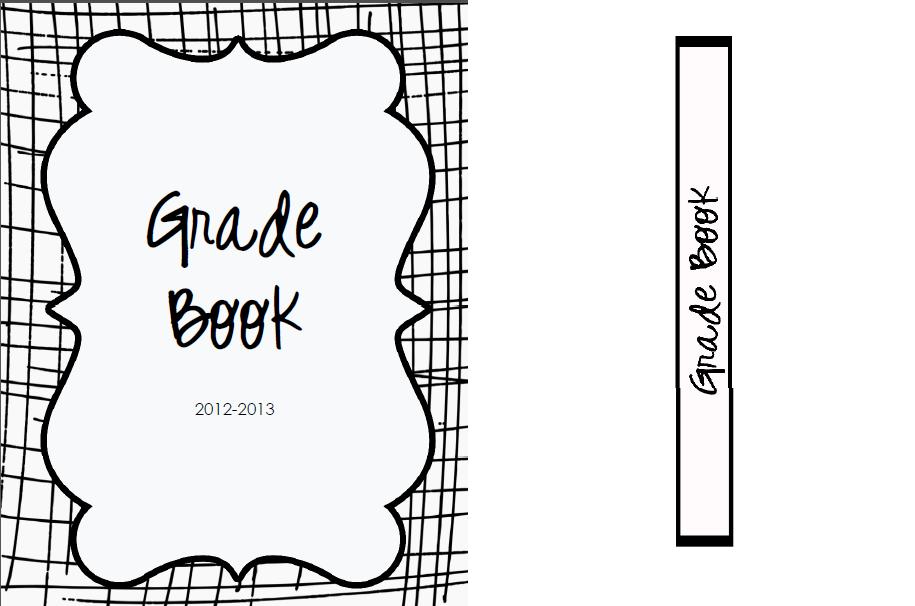
At the end of this post, I will also give you a FREE Binder Cover page and Spine Label for your own Grade Book Binder. Woot!
What I've Used
The school I taught in for 6 years always had an online Grade Book where parents and students could access it 24/7. I think this is a cool feature because it helps parents to be able to see how their students are performing, if they've missed an assignment, etc.
The only problem with online grade books is- what happens if there is a glitch in the system and all of your grades get lost? I seriously don't even want to think about that! All your hard work of grading those assignments, all of the hours you spent putting those grades online, and all of the hours your students spent doing those assignments- just gone. Completely wiped out.
Now, the reality is, more than likely your online grade book system will always work just fine and nothing will happen to your grades. However, can you be 100% sure that nothing will happen to your program? Nope. No one can.
So my solution to this was to print each subject's grades EVERY time after I imported them into the computer. This may seem a little overkill, but I wanted to make sure that I didn't miss anything! (For those of you trying to save paper, I totally get it- I am a fan of trees and I try to do as much paperless as I can- however, my grade book is one area that I use more paper than I like to. But I feel it is important for me to use a little more paper in this area to make sure that my grades are recorded somewhere else. I probably don't use more paper than a traditional grade book from a teacher store even printing out my grades each week.)
Creating the Grade Book
I am a HUGE fan of 3-ring binders! Everything I have is organized in 3-ring binders. It keeps everything in order and I can easily find it.
First, print off the Binder Cover and Spine Label from the end of this post. Put them in your chosen binder.
Next, buy as many Tab Dividers as you have subjects. Label each tab with a different subject name.
Thirdly, when you print out your grades, hole punch them and put them behind the designated tab for that subject.
Note: I always put my newest grades on top of the old grades.
So that's it! Pretty easy, eh? No need to write grades down, then transfer them to the computer. Just input them, print and put them in your Grade Book Binder. Sweet, eh?
Tomorrow I will be talking about my Grading Plan for the upcoming year and there will be a FREE Grading Plan template to download!
Live long and prosper,
So today I am going to talk about the
At the end of this post, I will also give you a FREE Binder Cover page and Spine Label for your own Grade Book Binder. Woot!
What I've Used
The school I taught in for 6 years always had an online Grade Book where parents and students could access it 24/7. I think this is a cool feature because it helps parents to be able to see how their students are performing, if they've missed an assignment, etc.
The only problem with online grade books is- what happens if there is a glitch in the system and all of your grades get lost? I seriously don't even want to think about that! All your hard work of grading those assignments, all of the hours you spent putting those grades online, and all of the hours your students spent doing those assignments- just gone. Completely wiped out.
Now, the reality is, more than likely your online grade book system will always work just fine and nothing will happen to your grades. However, can you be 100% sure that nothing will happen to your program? Nope. No one can.
So my solution to this was to print each subject's grades EVERY time after I imported them into the computer. This may seem a little overkill, but I wanted to make sure that I didn't miss anything! (For those of you trying to save paper, I totally get it- I am a fan of trees and I try to do as much paperless as I can- however, my grade book is one area that I use more paper than I like to. But I feel it is important for me to use a little more paper in this area to make sure that my grades are recorded somewhere else. I probably don't use more paper than a traditional grade book from a teacher store even printing out my grades each week.)
Creating the Grade Book
I am a HUGE fan of 3-ring binders! Everything I have is organized in 3-ring binders. It keeps everything in order and I can easily find it.
First, print off the Binder Cover and Spine Label from the end of this post. Put them in your chosen binder.
Next, buy as many Tab Dividers as you have subjects. Label each tab with a different subject name.
Thirdly, when you print out your grades, hole punch them and put them behind the designated tab for that subject.
Note: I always put my newest grades on top of the old grades.
So that's it! Pretty easy, eh? No need to write grades down, then transfer them to the computer. Just input them, print and put them in your Grade Book Binder. Sweet, eh?
Tomorrow I will be talking about my Grading Plan for the upcoming year and there will be a FREE Grading Plan template to download!
Live long and prosper,
-------------------------------------
P.S. Did you know that I started my own company, Camp Partridge?
⛺️ Camp Partridge offers online camps for children and teens ages 10-16 who want to be digital creators and authors!
⛺️ Camp Partridge offers online courses for parents struggling with remote learning.
⛺️ Camp Partridge offers resources for your classroom!
I would be honored if you would share Camp Partridge with people you know who need or would enjoy our camps and courses! 🧡
Thursday, June 21, 2012
Creating A Lesson Plan Book
Good morning everyone! :)
Today's topic (as you can tell from the title) is Creating a Lesson Plan Book. I am going to share what I used, some great ideas I've found and some things I've found didn't work for me. At the end of the post, I will share my lesson plan binder pages & cover with you! :) Keep in mind that a Lesson Plan Book is a personal choice. Some teachers prefer to use a traditional plan book, while some like to use the computer. Choose what works best for you.
What DIDN'T work for me:
I really didn't care for the traditional planning book that you would get from a teacher's store. The thing that was a pain about it was that you spent about 10 minutes just filling in your class titles at the top of the pages for the week and filling in any Specials information. To me, this was a waste of my time. Also, the boxes were so small, I didn't have as much room as I wanted to fill in my lesson notes.
What DID work for me:
A colleague of mine, Mrs. Comer, shared her lesson plan template with me. It uses one page for each day. You can customize it however you want to! In the document below, you will be able to have Monday-Friday's schedule already pre-printed with your specials information, etc. And there is plenty of room for lesson notes.
I simply printed out a quarter's worth (9 weeks) of weekly lesson plan pages at a time. I would 3-hole punch them, and then I would put them into a binder. The Lesson Plan binder I kept contained 3 sections: my year long plan, my weekly lesson plans, and a month by month calendar. This year I plan to add a Common Core Checklist section to my lesson plan book, instead of having them kept in a separate place.
I personally like writing out my lesson plans. I feel like I spend enough time on the computer as is! :) However, I am considering either typing my lesson plans this year, or using an online software.
TIP: Buy an inexpensive cookbook holder (I had one I never used at home) and prop your lesson plan binder up on that bad boy. It keeps it easy for you to see, gives you your desk work space back, and keeps it up off of your desk where stuff could get piled on it. That was the best way I found to keep my lesson plan book accessible.
I really liked THIS idea from Pinterest. The original website is a scrapbooking website and their idea is to use the paper towel holder and plastic binder pages and rings for organizing your scrapbook stickers. Someone suggested keeping your lesson plans in the pages instead. I thought that was a good idea...just not sure if it would rotate around too much- but I wanted to share the idea in case someone out there might be able to use it.
Pinterest:
Ok... I will sing the praises of Pinterest... It is by far one of my most favorite websites. I used to do a Google Image Search for things I wanted, and Pinterest is like that, except better! :) I always find great ideas on Pinterest! If you do a general search with the words "lesson plan," tons of ideas and different templates will come up. Check them out if you haven't seen anything here that fits you and your classroom! :)
Purchasing Lesson Plan Pages:
If you don't mind paying a few dollars for your lesson plan templates, I would suggest checking out Ms. M's Blog. She has lots of great ideas and tons of lesson plan templates. Check out her blog HERE. The one I want is the month calendar called Calypso Calendar. I made a monthly calendar myself, but hers is way cuter! :) I am sure that if you go to the Teachers Pay Teachers website you would also be able to find lesson plan templates to download for free and to purchase.
Online Lesson Planning:
Something I am considering using this year is Planbook.com. It seems like a really neat site where you can plan your lessons online (so you will have access from any computer-even if you forget your lesson plan book at school!). It is very organized and you can re-use lessons from year to year. There is a subscription fee of $9.95 for the year. I feel like that is a nominal fee for a great tool like this. I've never used it, so I will probably do the 30 day free trial first to make sure I like using it. Not 100% sure if I will use that site or just my traditional lesson planning pages (below).
UPDATE: (6-29-12) I totally forgot to post the Lesson Plans Notebook Cover and Spine Label I created for you! Dang it! Well...here it is... better late than never I guess! :)
Also, I've found another blogger who's offering FREE Lesson Plan Binder Cover Pages. They are pretty neat! So check 'em out over at Just Another Day in First Grade. You can find another really cute set of binder covers for FREE at A Year of Many First's Blog. Click HERE for her free binder covers.
What about you? What is your favorite way to plan your lessons? Have any freebies to share with your fellow online teacher friends? :)
Tune in tomorrow when I will be sharing my Strategy Grouping Planning Pages with you!
Wishing you the best today,
Today's topic (as you can tell from the title) is Creating a Lesson Plan Book. I am going to share what I used, some great ideas I've found and some things I've found didn't work for me. At the end of the post, I will share my lesson plan binder pages & cover with you! :) Keep in mind that a Lesson Plan Book is a personal choice. Some teachers prefer to use a traditional plan book, while some like to use the computer. Choose what works best for you.
What DIDN'T work for me:
I really didn't care for the traditional planning book that you would get from a teacher's store. The thing that was a pain about it was that you spent about 10 minutes just filling in your class titles at the top of the pages for the week and filling in any Specials information. To me, this was a waste of my time. Also, the boxes were so small, I didn't have as much room as I wanted to fill in my lesson notes.
What DID work for me:
A colleague of mine, Mrs. Comer, shared her lesson plan template with me. It uses one page for each day. You can customize it however you want to! In the document below, you will be able to have Monday-Friday's schedule already pre-printed with your specials information, etc. And there is plenty of room for lesson notes.
I simply printed out a quarter's worth (9 weeks) of weekly lesson plan pages at a time. I would 3-hole punch them, and then I would put them into a binder. The Lesson Plan binder I kept contained 3 sections: my year long plan, my weekly lesson plans, and a month by month calendar. This year I plan to add a Common Core Checklist section to my lesson plan book, instead of having them kept in a separate place.
I personally like writing out my lesson plans. I feel like I spend enough time on the computer as is! :) However, I am considering either typing my lesson plans this year, or using an online software.
TIP: Buy an inexpensive cookbook holder (I had one I never used at home) and prop your lesson plan binder up on that bad boy. It keeps it easy for you to see, gives you your desk work space back, and keeps it up off of your desk where stuff could get piled on it. That was the best way I found to keep my lesson plan book accessible.
I really liked THIS idea from Pinterest. The original website is a scrapbooking website and their idea is to use the paper towel holder and plastic binder pages and rings for organizing your scrapbook stickers. Someone suggested keeping your lesson plans in the pages instead. I thought that was a good idea...just not sure if it would rotate around too much- but I wanted to share the idea in case someone out there might be able to use it.
Pinterest:
Ok... I will sing the praises of Pinterest... It is by far one of my most favorite websites. I used to do a Google Image Search for things I wanted, and Pinterest is like that, except better! :) I always find great ideas on Pinterest! If you do a general search with the words "lesson plan," tons of ideas and different templates will come up. Check them out if you haven't seen anything here that fits you and your classroom! :)
Purchasing Lesson Plan Pages:
If you don't mind paying a few dollars for your lesson plan templates, I would suggest checking out Ms. M's Blog. She has lots of great ideas and tons of lesson plan templates. Check out her blog HERE. The one I want is the month calendar called Calypso Calendar. I made a monthly calendar myself, but hers is way cuter! :) I am sure that if you go to the Teachers Pay Teachers website you would also be able to find lesson plan templates to download for free and to purchase.
Online Lesson Planning:
Something I am considering using this year is Planbook.com. It seems like a really neat site where you can plan your lessons online (so you will have access from any computer-even if you forget your lesson plan book at school!). It is very organized and you can re-use lessons from year to year. There is a subscription fee of $9.95 for the year. I feel like that is a nominal fee for a great tool like this. I've never used it, so I will probably do the 30 day free trial first to make sure I like using it. Not 100% sure if I will use that site or just my traditional lesson planning pages (below).
UPDATE: (6-29-12) I totally forgot to post the Lesson Plans Notebook Cover and Spine Label I created for you! Dang it! Well...here it is... better late than never I guess! :)
Also, I've found another blogger who's offering FREE Lesson Plan Binder Cover Pages. They are pretty neat! So check 'em out over at Just Another Day in First Grade. You can find another really cute set of binder covers for FREE at A Year of Many First's Blog. Click HERE for her free binder covers.
What about you? What is your favorite way to plan your lessons? Have any freebies to share with your fellow online teacher friends? :)
Tune in tomorrow when I will be sharing my Strategy Grouping Planning Pages with you!
Wishing you the best today,
-------------------------------------
P.S. Did you know that I started my own company, Camp Partridge?
⛺️ Camp Partridge offers online camps for children and teens ages 10-16 who want to be digital creators and authors!
⛺️ Camp Partridge offers online courses for parents struggling with remote learning.
⛺️ Camp Partridge offers resources for your classroom!
I would be honored if you would share Camp Partridge with people you know who need or would enjoy our camps and courses! 🧡
Subscribe to:
Posts (Atom)