Showing posts with label For New Teachers. Show all posts

Tuesday, April 15, 2014

How I Stay Organized- A Peek at My Organizational Binders

I love to be organized!! I think that without organization, there’s no way I’d be able to teach. 

Some people keep everything on their computers- and while I do keep all of my files on my computer- I also like to have a hard copy of things as well- I think this stems from my deep mistrust of computers.  I always think back to Skynet and the Terminator movies ;)

But in all seriousness, I do love to keep a hard copy- this way I don’t have to be logged in to my computer to access all of my data.  And until our school systems and teachers are all doing everything online, there will be hard copies of things you will have to keep track of. 

I do love to create my own binder covers and make them fun- I’m going to have to look at them daily for the next 9 months, so I need them to make me happy!  I created several binder covers (and the matching spine labels- you can’t have a cover without a matching spine label!) that have helped me IMMENSELY throughout the last few years, and now I want to share with you how I organize my teaching life.

Binder #1- The Teacher Organization Binder


I could not live my day-to-day life without this binder.  I literally use it every day!  The sections in this binder are:

To Do Lists- A page for my sticky-notes of my to-dos
Info Lists- Class Lists, Photo Release Lists, Approved Parent Volunteer Lists, etc.
Calendar- A copy of the school calendar- where I write all important dates and meetings down.
Year Long Plans- A copy of our district’s year long plans, broken down by quarter.
Common Core Checklist- A list of all of the year’s Common Core objectives.
IEP Info- A quick reference list of my IEP student’s modifications and needs.
Lesson Plans- A copy of each week’s lesson plans. (I have these templates in my TPT store!)
Meeting Notes- A place to put any notes from school or parent meeting notes- I always know where my notes are- it has come in handy more than a few times!
PLT Meeting Notes- A place to keep notes and records of PLT meetings.
Student Info- I keep a list of my student’s parent contact info here and any allergy info as well.
Lent & Borrowed Items List- A place to keep track of who you’ve lent things to- and who you borrowed stuff from… trust me, you’ll forget if you don’t write it down!


Binder #2- The Gradebook

Now I know many of you, like myself have an online gradebook that you use for all of your grading during the quarter.  However, as wonderful as online gradebooks are, there is always the risk that the data you inputted may not be there later. 

Each quarter, I print my final gradebook so that I have a printed record of each student’s grades throughout the quarter, and this also makes it so much easier when speaking with a parent in a conference to be able to show them their child’s grades in print. 

I also keep track of homework and morning work in a separate section of my gradebook.


Binder #3- Parent Contact Log


This binder is essential.  I have a page for each student in this binder (pictured above) with their name at the top.  Any time I have to contact their parent (with the exception of email), I make a quick note of the date and time I spoke with them or sent them a letter or a discipline referral.  I also write down if they’ve contacted me with a note or a phone call, and will insert the note in the binder behind that child’s paper. 

This helps out so much if you need to go back and check your records if a parent has a concern.  I do not keep track of emails sent and received from parents, because I send and receive about 20-30 parent emails each day.  And I save every email I send and receive so that I have a record of those.  There is no need to write these down, in my opinion.


Binder #4- Reading Assessment Binder

I am mainly a reading teacher, so I like to keep good records on my students.  Here are the tabs in my Reading Binder:
Assessment Info- Benchmark testing data (ie: mClass scores, DRA scores, etc)
Reading Levels- A list of the reading levels of the students in my classroom.
Meeting and Conference Planning- a monthly calendar where I write which students I will be meeting with on what days.
Conference Ideas- Ideas for individual meetings with students and what they need to work on.
Book Clubs- a place to keep the meeting checklists and work from student book clubs I’ve met with each week.
Student Data- any other info or data on my students that I feel is important.
Anecdotal Notes and Labels- a place to keep address labels so that I can jot down something quickly about the student and put it on their conference sheet.


Binder #5-  Notes for my Teacher


I love when my students are thoughtful enough to take the time to write me a note or draw me a picture.  But if you’re like me, once you put one drawing up, 10 more students have drawn you something to put up as well.  As sweet as this is, after awhile, your wall is littered with drawings.  When do you take them down? Do you throw them away after you have? 

I saw this idea and I put it into place last year- and I LOVE IT!!  I made a “Notes for My Teacher” binder, and put clear plastic protector sheets in it.  Any time a student draws me a picture or writes me a note, I make a big deal about it, thank them for it and tell them I am putting it in my special notes binder.  I do it in front of them so that they know I am keeping it.  It still makes them feel special, and you do not have a wall of drawings falling off every day.

Also, at the end of the year, you can go through and clean out that binder and use it again next year.  If a student spent a lot of time on something or you have something sentimental in the binder you can keep it instead of wondering where it went. 


I hope this peek into my organizational binders has helped!  I urge you to create your own binders (or revamp the ones you currently have) to help keep yourself organized. 

I have all of the above mentioned binder covers will be for sale soon in my Teachers Pay Teachers Store individually and I am selling them as a pack together (for a discounted price).  Visit my store if you’d like to see these guys!

Have a great day,

Ashley J

Friday, August 3, 2012

Absent Students

What do you do when a student is absent from your class?  There are lots of different ways of dealing with this.  Last year, whenever I had a hand out, I would place one on the absent student's desk, and at the end of the day, I would paperclip all of the work together.

That wasn't organized enough for me, so I created a word document that I saved on my computer and would type out any day a student was missing.  This is what it looked like:


(I've uploaded both of the forms onto Google Drive as "Word" forms so that you can save and edit them for your personal use :)

It may sound like a ton of work, but once I had the template created, it was really very simple just to plug in the info for that student.  And if you had two students missing on the same day, I just changed the name at the top of the page and printed another copy.  This way, I had a copy saved in my computer of what the student had to do in case there were any problems with the parents having concerns about what was due.  I also put a line on the bottom of the paper for a parent signature.  The student was responsible for returning this paper with their work so that I knew the parents at least knew what their student's responsibilities were from the days they missed.

After I printed this page out, I would paperclip it to the papers and I would collect any materials that they needed to complete their assignments.

Even though this was an ok system, it wasn't great.  Sometimes papers would get lost or crumpled in their backpacks, or I would accidentally forget to give them one of the things they needed to complete their assignments.

So this year, inspired by the Paper Drop System by Laura Candler, I decided to make a directions/checklist sheet that I will glue on the front of a 9x13 envelope.


(For some reason it wouldn't accept the clip art... so you can download your own clipart for the top of the page.  Also the font I used for the title is called "A Truer Blue" from Kevin and Amanda Fonts.  The other font I used was Century Gothic.)

Then, after gluing this on the envelope, I will laminate the entire envelope to make it more sturdy.  All of their paper, materials and the sheet above will be put into the envelope.  The checklist will show all of the materials needed so that they won't forget any if they are gathering the materials, and so that I won't forget any if I have to gather the materials.  Because the envelope will be laminated, I will use a wet-erase marker to check the supplies on the folder.

I plan on making several so that I will have enough if I have several students out at one time.

How do you handle absent students in your classroom?  Your thoughts & ideas are always appreciated!! :)


-------------------------------------

P.S.  Did you know that I started my own company, Camp Partridge?  

⛺️ Camp Partridge offers online camps for children and teens ages 10-16 who want to be digital creators and authors

⛺️ Camp Partridge offers online courses for parents struggling with remote learning

⛺️ Camp Partridge offers resources for your classroom!

I would be honored if you would share Camp Partridge with people you know who need or would enjoy our camps and courses! 🧡

Tuesday, July 31, 2012

Classroom Jobs

Classroom Jobs are a great way to give your students more responsibility, help them to take ownership in the classroom, and to free you up from easy tasks that take up too much time.  I am totally a fan of classroom jobs!

Last year was the first year I was a classroom teacher- I had never had students in my classroom all day or even for a long enough time period to make classroom jobs worthwhile.  When I was able to use them, however, they rocked!  It was wonderful to have students help me do the jobs that take up so much of our precious time!

So here's what I did: 
I thought of all of the jobs I wanted students to take care of in my classroom.  Then I got some Library Pockets from the local teacher store and created a little chart area under my SMARTboard.  I labeled each Pocket with a specific job title.  Then, I wrote all of my student's names on index cards.  I let them keep their job for one week, then I would rotate all of the cards down the list one spot each, and I had an extra pocket for the extra students who didn't have jobs.  I would pull a card from the front of the extra pocket to put in the very first spot on the list after I'd moved all the cards down one spot.

Looking back on this system, it was ok...it worked fine... but it wasn't GREAT.  So I researched what other teachers did.  I really liked the idea I found on one blog where the teacher had a job for EVERY student.  This way no one feels left out AND it gives them a sense of purpose when everyone is doing a classroom job.

Another thing that didn't work GREAT for me was having to switch out the jobs every week.  You would think that it takes seconds (which it doesn't take long), however, at the end of the week sometimes I would forget or just think I would do it Monday morning.... it kind of became a thorn in my side... and it was annoying.  Several teachers blogs I've read use a Classroom Job Application.  Students apply for the job they want (and add 2 back up choices) and tell WHY they want that job.  Then the teacher decides which student would be best for that job.  The students keep this job for a whole MONTH.  No switching of cards every week- just once a month.  Then the next month they apply again for another job.  I really like this idea because it gives them more choice in the matter and I feel like they would take it more seriously if they actually had a say in what job they got.  If you are doing this type of system with your class, I would suggest having jobs for EVERYONE- just because it would be a whole month before a student could get a job if they didn't have one.

This year I will be teaching 5th Grade Language Arts... so I will see 3 classes of 5th grade instead of just having one class all day.  I still plan to have classroom jobs, but I think I am going to just split the jobs up between the classes.  That means not all students will have jobs.  I am also going to use the Classroom Job application system, and only change out the jobs once a month.  I wish I could have jobs for everyone- but sometimes it just doesn't work out that way.  (I mean, I could probably create jobs for everyone, but I don't want to keep track of 90 jobs!! ;)

Also, instead of just writing names on index cards, this year I am going to use my classroom numbers- I picked up an awesome set from Clutter Free Classroom's Flash Freebie one day... and they rock!! If you have the money, I would definitely suggest getting them!  If not, check out the links below for some other great FREE classroom numbers!

I couldn't find any Classroom Job Applications that I liked for my older students, so I ended up creating one... you can download it for FREE below! :)


**Update  8/25/14- I have uploaded an EDITABLE version of this Classroom Job Application at my Teachers Pay Teachers store.


Below are some awesome links to FREE Classroom Job Applications and Job Posters & Cards for your classroom:

Cute & Customizable Classroom Jobs AND Classroom Job Application  (from A Year of Many Firsts)

Owl Themed Classroom Jobs (from Middle Grades Maven)

Hollywood Themed Classroom Jobs  (from First Grade Parade)

Red & Light Blue Background Classroom Job Labels

Plain Background Classroom Jobs (from What the Teacher Wants)


FREE Classroom Numbers for your Library Pockets (simply print and then glue on an index card & laminate)

Brightly Colored Class Number Circles

Yellow Stars w/ Red Background Class Number Circles

Zebra & Lime Green Class Number Circles

Dr. Seuss-like Red and Teal Blue Class Number Circles


Do you have any tips or suggestions for classroom jobs?  What works in your classroom?

Rawr,


-------------------------------------

P.S.  Did you know that I started my own company, Camp Partridge?  

⛺️ Camp Partridge offers online camps for children and teens ages 10-16 who want to be digital creators and authors

⛺️ Camp Partridge offers online courses for parents struggling with remote learning

⛺️ Camp Partridge offers resources for your classroom!

I would be honored if you would share Camp Partridge with people you know who need or would enjoy our camps and courses! 🧡


Monday, July 30, 2012

Advice for New Teachers

Today's post is inspired by Stephanie over at Teaching in Room 6 (one of my most favorite blogs!).  Today she shared a really encouraging post about when she was a first year teacher.  I think that every teacher remembers their first year of teaching.  Lots of difficulties and stress and things you aren't prepared for.  (Hopefully that isn't discouraging to you- I just want to let you know that it is normal to feel that way and that others feel that way too! :)

So, I am linking up with her blog today to share a few pieces of advice from things that I've learned in my 6 years of teaching.  Hopefully it will help you :)  And after you're done reading my post, click on the picture below to check out the post on Stephanie's page to find lots more good advice for new teachers!

teachinginroom6.blogspot.com, education, upper grade, 5th grade, 4th grade


1.  Whatever you go through in your first year of teaching, know that you are NOT ALONE. 
Believe me when I say that new teachers all over the world are dealing with some of the same feelings and issues you are dealing with.  It's ok!  It's normal!

2.  Find another teacher that you can talk to on a personal level.   
I was blessed to have 4 good friends who were also teachers and we all taught our first year at the same time!  We would get together once a month just to hang out.  We would talk about everything going on at school and help each other out with ideas and things that worked for us.  But I think the best thing about having 4 friends who were first year teachers was that I realized that they were dealing with the same things I was going through.  It made me feel less stressed and more normal... and helped me to realize that even though I wasn't a great teacher, that I wasn't a failure either.

3.  Read the book, The First Days of School by Harry and Rosemarry Wong & take their advice to heart.  Follow what they say to do in the book!  
My college professors told us to read that book... and I didn't listen.  I actually just recently read it- MAN!  I totally wish I would have read this BEFORE I first started teaching.  It's funny, because I actually do most of the things that they suggest in the book- only I learned that I needed to do that stuff the hard way.  There are SO MANY great ideas.  It is definitely worth a read.  

4.  Classroom Management is KEY.  
If you can't keep your students in order, you will not get much teaching done.  Spend your first week mostly going over your classroom and school procedures and routines.  (If you are not sure what procedures and routines you should have in your classroom, The First Days of School has a GREAT list on page 193 to get you started.  You may not need all of these procedures, but I think it is a great list for ANY teacher.)  Don't worry too much about curriculum the first week.  And after the first week, continue having your students practice your procedures and routines for at least the first month of school.  If they can learn your procedures and routines, then your class will flow more smoothly the rest of the year!

5.  Make sure to ask for help.
I know this is a repeat of advice from Stephanie's blog, however, it is SO important.  Before the school year starts (I'd even say before your teacher's meetings start), make a list of questions to ask your mentor teacher, principal or the office ladies about the school's expectations, procedures, etc.  This way you will not be going through your day and a question comes up and you have no idea what to do.  (For example: field trips- how far in advance do your lunch ladies need a lunch count in order to order food for sack lunches for your field trip?  If you don't know the answer to this in advance, this might cause a problem for you being able to get sack lunches for your field trip or if you can get them, it could cause frustration between you and the lunch ladies for not getting the order to them soon enough.)  Now don't let this stress you out- there is no way you can ask EVERY question before you will need the answer.  However, if you have a good list of questions to start off with, then it will reduce the number of times situations like the one above will occur. 

Also, don't be afraid to ask. (I know some of you look at that statement and laugh, because you are not afraid to ask anything to anyone! :) But for some of you, you might be afraid to ask because you don't want to seem like a bad teacher or you don't want to bother someone with your questions.  Please know that you ARE NOT a bother!  And no one has it all together!  I'm sure I asked the office ladies 5 questions a day (at least) for the first semester I taught during my first year of teaching.  They always were polite and answered all of my questions!  HERE is a list of questions that I've come up with to ask when you are new to a school district to get you started.


Hope this is helpful!  If you have taught and would like to share some advice for new teachers, you can link up with Stephanie's blog by clicking the link above, or you may leave a comment below!   Thanks so much for reading!


Marking my spot, 


Thursday, July 26, 2012

Scholastic Book Clubs

*Note:  This post is mainly for New Teachers or teachers who've never used Scholastic Book Clubs before.


I LOVE Scholastic Book Clubs.  I am not paid by them in any way to tell you about their program- I just really love it!

I remember getting Book Orders as a kid.  That was like the most fun thing about school for me.  I've always loved books and reading-- and getting a new book was so much fun!!  The thing I love about Scholastic Book Clubs is that the books they have in their Book Orders are reasonably priced- usually several dollars cheaper (if not more) than buying a book at a bookstore.

The other cool thing is that for each dollar spent by your students (or you), you will get bonus points in your Scholastic Account.  With these bonus points, you can purchase teaching materials, books from the book order for your classroom library, or gift books for your students.

And just so you know (for those of you who have never done a book order before), it is so easy! There are step-by-step directions on Scholastic's site and all you have to do to get started is create a user name and password (just like setting up an email account).  They've also added an "order online" option that you can now use and parents can use their credit cards to order online.

Even if you teach in a school where you don't think that students would buy very many books, honestly, I would order the book orders for myself!  Each book order I spend about $5-$10 and I can purchase books for my Teaching Library that are way less expensive than going to a large bookstore.  The book orders usually have one or two books in each book order that are $1- these make great gifts and sometimes they are great for your Teaching Library.

Last year, Scholastic was giving 25 FREE books to new teachers that sent out scholastic book orders.  They came in 3 installments and they were all GREAT books!   So, just for sending them home and collecting a few orders, you get FREE books!

In my opinion, I think that Book Orders are fun, gives students an opportunity to own literature at a lower cost, and also shows students the different types of books that are available.  (Even if they can't afford to own it, maybe they can find it at the school or local library to rent).   Even the times I couldn't afford books, I still loved to look at the book orders!  (And it also gives them more high-interest reading material!)

Here is the Scholastic Book Clubs Website:  Scholastic Teacher Rewards.  Visit it and sign up today!

P.S.  If you want to get 250 FREE bonus points for yourself (and another teacher already using Scholastic Book Clubs), just print THESE coupons from Scholastic's website!! Totally worth it!

UPDATE: (8-3-12)
Laura Candler has a great post, found HERE, about how to earn oodles of extra bonus points-up to 7,000!!   Check out her free guide HERE.  Definitely worth a read!!


That's all she wrote,


-------------------------------------

P.S.  Did you know that I started my own company, Camp Partridge?  

⛺️ Camp Partridge offers online camps for children and teens ages 10-16 who want to be digital creators and authors

⛺️ Camp Partridge offers online courses for parents struggling with remote learning

⛺️ Camp Partridge offers resources for your classroom!

I would be honored if you would share Camp Partridge with people you know who need or would enjoy our camps and courses! 🧡

Thursday, July 12, 2012

Make sure you get the FREE stuff!

I know I posted a few days ago about the Clutter Free Classroom's daily flash freebies for the month of July & August.  If you missed it-I want to make sure you know about all of the awesome goodness going on over on her blog!  EVERY DAY in July & August, she is sharing a tip of how to organize your classroom AND giving away a FREEBIE she designed to help with the orgainzational process.

Let me tell you that these are AWESOME!  I've pretty much downloaded everything she's shared! The only catch is that they are only free for ONE DAY.  You have to visit her blog every day to see what new goodness she is sharing.  Otherwise you will have to purchase the items from her Teachers Pay Teachers Store... which is still not a bad deal for what she has created.  But I want you to get them for free too!  Make sure you visit her blog every day!  The link is below! :)

ClutterFreeClassroom


Happy landings,

Monday, July 9, 2012

Questions to Ask When You are New to a School District

Good afternoon! :)

My last post was about the awesomeness that I got a job! :) I am so excited about it!   However, there are so many things to do and to think of now!

I taught in the same school district for 6 years before, so I knew all of the ins and outs of the district without having to think about it.  So, being new to a school, county & district, I have a TON of questions!  

When I was a brand-new teacher in a new school, I didn't know all of the questions I should ask...and I felt like every single day for the entire first year I was in my school I was constantly asking the office ladies or other teachers a billion questions.  I wish I had known them all to ask before school had started...it would have made my life a whole lot easier!

So, this year, I am going to be prepared and I've already thought of a list of about 100 questions (please don't let this number scare you... most questions are just quick answers) of things that I will need to know before school starts.

I have attached (at the bottom of this post) a copy of my list of questions.  I've tried to organized them into 3 sections:  Questions to Ask the Principal, Questions to Ask the Office Ladies, and Questions to Ask a Mentor Teacher.  This way you are not bombarding one person with 100 questions... and you will get the most accurate info from each person.

It is SO important to find someone to answer your questions BEFORE school starts.  This way you will be prepared and your students will see that you are organized, in charge and you know what's going on.

I know as a new teacher that it can be intimidating to ask your principal and/or mentor teacher questions- but  I am sure they will see it as a good thing- that you are organized and ready to learn how their school runs.  Be bold and confident.  Asking questions will help you to be prepared.

Note:  These may not be all of the questions you will need to ask, this is just a starter list- if you need to, add or remove questions to & from the list where appropriate.

P.S.  I've tried to leave spaces for you to write your answers directly on the pages... hope this helps!   (Also, I would keep the completed question/answer pages somewhere you will remember so you can reference them throughout the year.)


Aloha,

Thursday, July 5, 2012

Missing Assignments

Happy Thursday everyone! :)  I hope that you had a wonderful 4th!  


Today I want to tell you about what to do with Missing Assignments.  You know you will have those few students who have chronic problems with missing assignments.  I know I always seem to.  And everything I've tried so far hasn't worked as well as I wanted to.  


Last year my school used a computer-based grade book where you had the option to be able to print missing assignment reports for each student.  I tried to do this each week and send it home in their Friday Folders.  Then, their parent would have to sign it and return the paper, so they would at least know that their child was missing an assignment.  This method was very helpful for some of my students who just forgot or didn't want to finish their assignments.


The only problem with this method is that sometimes I wasn't able to update grades in the computer each week...then it was like 2 weeks before they got the missing assignment report.  Another teacher in our building would look through all of the papers right after they were turned in and then just enter "missing" into the computer so that she could make sure she had her reports up to date each week.  Then she would go back and enter grades at a later date.


I feel confident this year that I will be able to keep up with my grading each week because of the grading plan that I've set up for myself.  Also by using the Paper Drop system, everything will be so much more organized!


Missing Assignment Alerts
This year, because I'm using the Paper Drop system in my classroom, after an assignment is turned in, I will simply be able to look at the back of the envelope and see which students are missing assignments.  I will then call them up and have them take one of my MISSING ASSIGNMENT ALERT notes and have them write their name on my Missing Assignment Alert Clipboard.  They will have to fill in the applicable parts and then take it home to their parents.  Their parents will read it and sign it and the student will return it the next day.  This slip is just a reminder for the student to turn it in by the next day, and it is also a notice to the parents that their child has not turned in an assignment.  That way, the parents know THE DAY the assignment didn't get turned in, and it gives the student an opportunity to finish the assignment and turn it in.


I have them sign my clipboard because the next day I will ask them if they have the slip to give to me.  If they do not have the slip, then I will personally call or email their parents to see if they read the slip and know that their child has a missing assignment.  Please know that this piece of the system is IMPERATIVE.  If you don't receive the slip, you MUST call their parents.  Otherwise students will not take your system seriously and think you are making idle threats about doing things.  It will also help them to not want to have missing assignments and thus makes your job easier! :)


I am also excited about using this system because then I won't have to spend time each Thursday night preparing Missing Assignment Reports!

You can snag a copy of the a PDF of the Missing Assignment Alert and Clipboard List, as well as an EDTABLE plain text Word version of the Missing assignment alert on Teachers Pay Teachers for only $1.50!


Cary on bravely,


-------------------------------------

P.S.  Did you know that I started my own company, Camp Partridge?  

⛺️ Camp Partridge offers online camps for children and teens ages 10-16 who want to be digital creators and authors

⛺️ Camp Partridge offers online courses for parents struggling with remote learning

⛺️ Camp Partridge offers resources for your classroom!

I would be honored if you would share Camp Partridge with people you know who need or would enjoy our camps and courses! 🧡

Monday, July 2, 2012

FREE STUFF

I am a fan of FREE STUFF.  We teachers work hard all the time and spend oodles of our own money on our classroom.  So I love it when someone is willing to share awesome free stuff with the rest of us.  (Honestly that's the main reason I started this blog...to share it forward with my fellow colleagues!)

Anywho, down to the FREE STUFF!  The Clutter-Free Classroom's blog will be sharing classroom organization and management tips each weekday during July & August.  And not only that, but they are going to have a FREE download each weekday during July & August as well!  How awesome is that?!?   But, you have to visit their site EACH day... the download will only be free for one day.  After that it will be available for purchase from their TPT store.  

So make sure you check out the Clutter Free Classroom every day in July & August! 
ClutterFreeClassroom


Have a wonderful day! 

Setting Up Grading Expectations

Welp, it's Monday! Only 1 more day till the 4th and 6 more days till my 30th  birthday!!  Ah... but I digress...

Today I want to tell you about something I came up with for my students this year.  Grading has (for me) always been one of those illusive things... I've never really had a good system for myself for grading and I was tired of my students not really knowing how they were being graded.

So this year I was determined to make this something to focus on.  I feel like I have a pretty good system figured out for both me and the students.  I've already explained My Grading System to keep me organized and today I would like to tell you my plan to help my students understand where their grades are coming from.


How Am I Graded In...
I believe that setting up expectations FIRST is the key to success in anything you do.  This is especially true in your classroom.

For my students this year, I've created rubrics for each subject and also a description page that tells my students the type of assignment they will be graded on, then how many points they will receive for a completed, correct assignment.  I am going to print one out for each student (for each subject) and have them glue those papers into the front of their notebooks for that subject.

For example, here is my How Am I Graded in Reading? sheet.  I will have my students glue this page into their notebooks.


This way they will always have that page in front of them.  They will be able to check how much each type of assignment is worth.  Now, it won't be an "out of sight, out of mind" kind of thing with their grades.  If they choose not to do an assignment, they will automatically know how many points they will be losing.


Goal Setting & Tracking 
I've always wanted to do Goal Setting and Tracking with my students, but never found a great system for it.  As I was browsing Laura Candler's website the other day, I found this awesome-looking packet (already created!) on Goal Setting & Tracking.  She offers several of the documents for free, but the main e-booklet is only $6.95.  I am totally planning on ordering it!  Check out her website HERE to find the Goal Setting & Tracking E-Booklet.  On the right-hand side of the page you will see her FREEBIES and it will give you a better idea of what's in the e-book.  I can't wait to try this with my students...I am hoping it will make a difference for all of my students...especially those who are not as motivated.


How do you set up grading expectations in your classroom?  Do you use goal setting with your kiddos?  If so, what does that look like & has it worked?


Take care now, bye bye then,


ps... brownie points to the first person who can name the movie that my sign-off line today!   :)


-------------------------------------

P.S.  Did you know that I started my own company, Camp Partridge?  

⛺️ Camp Partridge offers online camps for children and teens ages 10-16 who want to be digital creators and authors

⛺️ Camp Partridge offers online courses for parents struggling with remote learning

⛺️ Camp Partridge offers resources for your classroom!

I would be honored if you would share Camp Partridge with people you know who need or would enjoy our camps and courses! 🧡

Friday, June 29, 2012

The Paper Drop System

Good afternoon! :)

Today's post also has to do with grading.  When I taught Middle School specials classes, I just used the tray system.  I didn't have many papers to grade and that worked well for me.  So, I thought I would try the same system out with my 4th graders.  ....Let's just say it didn't work out as I had planned!   Here is what my trays looked like:


Looks decently organized, right?  Yeah... this was on a good day.  I labeled each tray with the name of the subject (using a Sharpie and some masking tape).  The problem with this system was, if students turned in more than one assignment to the tray before I collected it, then I had to sort through several assignments work of papers and divide them into their individual assignment piles before I could even grade them!  This took so much longer... and then sometimes you would find a rogue paper that got turned in later in another assignment pile.

Part of my problem was that I did not have a grading system.  Yesterday's post talked about my plan for this year and grading. Check it out HERE if you missed it.  So the last couple of months I've been searching for a different system that would work better and keep me and the students more organized.

The solution?  Laura Candler's Paper Drop System!   I cannot sing the praises of Laura Candler enough!  She is amazing!  You totally have to check out her website.  Seriously.  Don't wait.  Just do it!  She has so many great ideas and freebies for teachers.  She has also written a number of books and has other things for sale at the TPT website.


Basically, you use 9x12 brown clasp envelopes.  She has a free printable page you will glue on the front and back of the envelopes.  Then you laminate the entire envelope.  You will need to create quite a few envelopes.  (I plan on creating enough envelopes to hold an entire week's worth of assignments for each subject.)


When you collect an assignment, you put all the papers in one envelope, (with a wet-erase marker) write the assignment's name on the front and check off any students who haven't turned in their work on the back of the folder.  Close the envelope with the clasp and keep in a place for grading at a later time. This way ALL of the papers from one assignment are in ONE place.  You will know who turned stuff in late, and who is missing each assignment at a quick glance.  How awesome is that?!? I can't wait to use the Paper Drop System in my classroom!  I know it will help me out so much with my grading and organization.  


The best thing about the Paper Drop System is that it is totally FREE! Woot Woot!  I loves me some free stuff!   Click HERE for a free download of her Paper Drop System.


I also found a really cool idea on Pinterest the other day:

On-the-Go Filing

but it is actually from the Better Homes and Gardens Website.

Here's another version of the same thing: http://pinterest.com/pin/167829523584004285/


My Idea:
I am planning on creating one of these to organize my Paper Drop Envelopes.  This way, all of the envelopes will be in one place and will be organized! I think it will work awesome!

How about you?  How do you collect student's papers?  What have you tried that's worked?


For Strength & honor,


Wednesday, June 27, 2012

Creating a Grade Book

Howdy everyone!

So today I am going to talk about the dread wonder that are Grade Books!  Yea!! Ok...so I am trying to put a positive spin on something that a lot of us dread... grading.  I am going to share what I did in my classroom, and how I plan to modify that this year in my classroom.

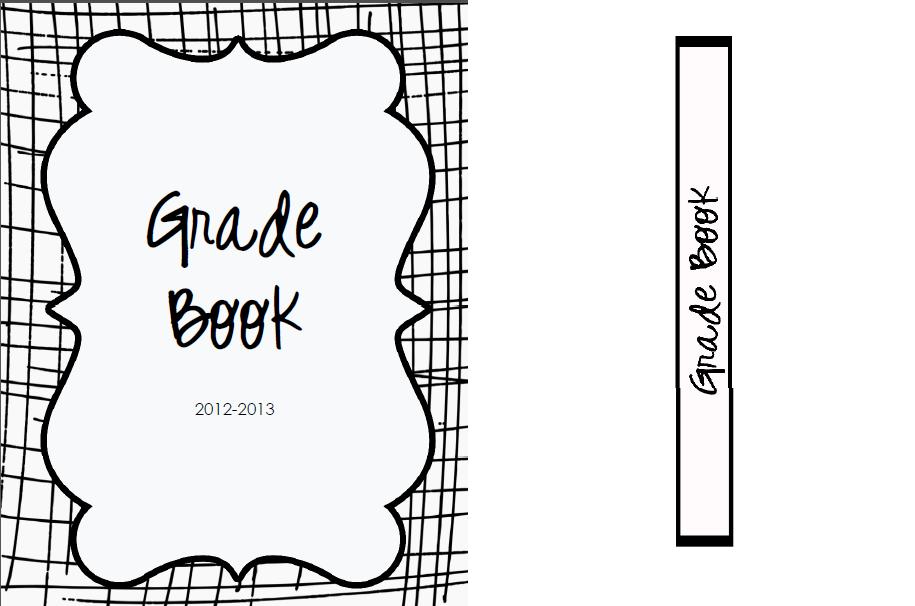
At the end of this post, I will also give you a FREE Binder Cover page and Spine Label for your own Grade Book Binder. Woot!

What I've Used
The school I taught in for 6 years always had an online Grade Book where parents and students could access it 24/7.  I think this is a cool feature because it helps parents to be able to see how their students are performing, if they've missed an assignment, etc.

The only problem with online grade books is- what happens if there is a glitch in the system and all of your grades get lost?  I seriously don't even want to think about that!  All your hard work of grading those assignments, all of the hours you spent putting those grades online, and all of the hours your students spent doing those assignments- just gone.  Completely wiped out.

Now, the reality is, more than likely your online grade book system will always work just fine and nothing will happen to your grades.  However, can you be 100% sure that nothing will happen to your program? Nope.  No one can.

So my solution to this was to print each subject's grades EVERY time after I imported them into the computer.  This may seem a little overkill, but I wanted to make sure that I didn't miss anything!   (For those of you trying to save paper, I totally get it- I am a fan of trees and I try to do as much paperless as I can- however, my grade book is one area that I use more paper than I like to.  But I feel it is important for me to use a little more paper in this area to make sure that my grades are recorded somewhere else.  I probably don't use more paper than a traditional grade book from a teacher store even printing out my grades each week.)

Creating the Grade Book
I am a HUGE fan of 3-ring binders! Everything I have is organized in 3-ring binders.  It keeps everything in order and I can easily find it.

First, print off the Binder Cover and Spine Label from the end of this post.  Put them in your chosen binder.

Next, buy as many Tab Dividers as you have subjects.  Label each tab with a different subject name.

Thirdly, when you print out your grades, hole punch them and put them behind the designated tab for that subject.

Note:  I always put my newest grades on top of the old grades.


So that's it! Pretty easy, eh?  No need to write grades down, then transfer them to the computer.  Just input them, print and put them in your Grade Book Binder.  Sweet, eh?


Tomorrow I will be talking about my Grading Plan for the upcoming year and there will be a FREE Grading Plan template to download!

Live long and prosper,


-------------------------------------

P.S.  Did you know that I started my own company, Camp Partridge?  

⛺️ Camp Partridge offers online camps for children and teens ages 10-16 who want to be digital creators and authors

⛺️ Camp Partridge offers online courses for parents struggling with remote learning

⛺️ Camp Partridge offers resources for your classroom!

I would be honored if you would share Camp Partridge with people you know who need or would enjoy our camps and courses! 🧡

Friday, June 22, 2012

Strategy Grouping Template for Reading, Writing & Math

Happy Friday!

Yesterday I talked about different types of lesson planning sheets, and even gave you a copy of my lesson planning sheets.   Another thing I used last year was a Strategy Group Planning Sheet for Reading.  I came up with the idea towards the middle to end of the year, and I wish I had come up with it earlier.  This planning page is a quick reference page that you can either keep in your lesson plan book, or you can keep it in your anecdotal reading records binder (I'll talk about this at a later date).

This page will give you a way to plan your strategy/skill groups and what days you want to meet with them.  It also has a space for writing down your individual conference schedule.  Not only will it help you plan out your week as far as your groups and conferences go, but it will also keep you on track during the week so that nothing gets forgotten.

Last year, I only used this template for reading.  However, this year I am going to try it with math and writing as well!  At the bottom of the post, I've uploaded all 3 templates for you.  If these don't fit your needs, just use my idea and create your own! :)

How to Use These Templates
This coming year I am going to be more intentional about my grouping.  Last year I based grouping mainly upon DRA (Developmental Reading Assessment) testing (at the beginning of the year) and then my observations of what my students needed.  I also based them upon our school's testing system (NWEA- a computer based test given to the students 3 times a year), and Study Island diagnostic information.

These were all fine and dandy, but I felt like I was missing something.  At the end of the year, as I was considering how I could make grouping even more focused, I came up with the idea to give my kids a 10 question quiz each week in reading, writing, and math which will cover what I taught that week.  That way, I can break down their answers and see which kids need help in which areas.  Then I will group the students with the same needs together, and I will have my groups for the following week!

Ok...don't get scared! I know that sounds like a lot of extra work.  But I've found a way to do it a little easier.  Google Drive (formerly Google Docs) is friggin awesome!  Did you know you can create a survey with multiple choice and short answer questions?  I am going to use this survey to create my quizzes each Friday.  Students will take the quiz on the computer, and then Google Drive kindly breaks down all the info for me... how sweet! :)  I got the idea from one of my favorite math teaching blogs, The Creative Apple.  The link is to her series on how to set up Guided Math.  This blows my mind.  I totally wish I had read this before I started teaching in an elementary classroom.  I love the Guided Math system, and definitely plan to implement it this year.  Sorry for the tangent... but I just had to share!

Anywho, from the info provided by Google Drive, I will then create my strategy/skill groups and also will see what students may need even more help (during an individual conference) than just a strategy group.  I will do a whole post later on about how to use the survey document on Google Drive.

So, does that kind of give you an idea of how to use these templates?  How do you group for instruction? 

UPDATE: 8/12/14 
I have uploaded all of the FREE templates to my Teachers Pay Teachers Store.  You can now access the same great free templates by clicking here:  Ashley Stout's Teachers Pay Teachers Store.

I have also had many requests to make the templates editable as these exact templates may not fit everyone's schedules.  You can find these templates at my Teachers pay Teachers Store by clicking HERE.  Thanks! :)


Mahalo for reading,
:) Ashley


-------------------------------------

P.S.  Did you know that I started my own company, Camp Partridge?  

⛺️ Camp Partridge offers online camps for children and teens ages 10-16 who want to be digital creators and authors

⛺️ Camp Partridge offers online courses for parents struggling with remote learning

⛺️ Camp Partridge offers resources for your classroom!

I would be honored if you would share Camp Partridge with people you know who need or would enjoy our camps and courses! 🧡


Thursday, June 21, 2012

Creating A Lesson Plan Book

Good morning everyone! :)

Today's topic (as you can tell from the title) is Creating a Lesson Plan Book.  I am going to share what I used, some great ideas I've found and some things I've found didn't work for me.  At the end of the post, I will share my lesson plan binder pages & cover with you! :)  Keep in mind that a Lesson Plan Book is a personal choice.  Some teachers prefer to use a traditional plan book, while some like to use the computer.  Choose what works best for you.

What DIDN'T work for me:
I really didn't care for the traditional planning book that you would get from a teacher's store.  The thing that was a pain about it was that you spent about 10 minutes just filling in your class titles at the top of the pages for the week and filling in any Specials information.  To me, this was a waste of my time.  Also, the boxes were so small, I didn't have as much room as I wanted to fill in my lesson notes.

What DID work for me:
A colleague of mine, Mrs. Comer, shared her lesson plan template with me.  It uses one page for each day.  You can customize it however you want to!  In the document below, you will be able to have Monday-Friday's schedule already pre-printed with your specials information, etc.  And there is plenty of room for lesson notes.

I simply printed out a quarter's worth (9 weeks) of weekly lesson plan pages at a time.  I would 3-hole punch them, and then I would put them into a binder.  The Lesson Plan binder I kept contained 3 sections:  my year long plan, my weekly lesson plans, and a month by month calendar.  This year I plan to add a Common Core Checklist section to my lesson plan book, instead of having them kept in a separate place.

I personally like writing out my lesson plans.  I feel like I spend enough time on the computer as is! :) However, I am considering either typing my lesson plans this year, or using an online software.

TIP:  Buy an inexpensive cookbook holder (I had one I never used at home) and prop your lesson plan binder up on that bad boy.  It keeps it easy for you to see, gives you your desk work space back, and keeps it up off of your desk where stuff could get piled on it.  That was the best way I found to keep my lesson plan book accessible.

I really liked THIS idea from Pinterest.  The original website is a scrapbooking website and their idea is to use the paper towel holder and plastic binder pages and rings for organizing your scrapbook stickers.  Someone suggested keeping your lesson plans in the pages instead.  I thought that was a good idea...just not sure if it would rotate around too much- but I wanted to share the idea in case someone out there might be able to use it.

Pinterest:
Ok... I will sing the praises of Pinterest... It is by far one of my most favorite websites.  I used to do a Google Image Search for things I wanted, and Pinterest is like that, except better! :) I always find great ideas on Pinterest!   If you do a general search with the words "lesson plan," tons of ideas and different templates will come up.  Check them out if you haven't seen anything here that fits you and your classroom! :)


Purchasing Lesson Plan Pages:
If you don't mind paying a few dollars for your lesson plan templates, I would suggest checking out Ms. M's Blog.  She has lots of great ideas and tons of lesson plan templates.  Check out her blog HERE.  The one I want is the month calendar called Calypso Calendar.  I made a monthly calendar myself, but hers is way cuter! :)  I am sure that if you go to the Teachers Pay Teachers website you would also be able to find lesson plan templates to download for free and to purchase.

Online Lesson Planning:
Something I am considering using this year is Planbook.com.  It seems like a really neat site where you can plan your lessons online (so you will have access from any computer-even if you forget your lesson plan book at school!).  It is very organized and you can re-use lessons from year to year.  There is a subscription fee of $9.95 for the year.  I feel like that is a nominal fee for a great tool like this.  I've never used it, so I will probably do the 30 day free trial first to make sure I like using it.  Not 100% sure if I will use that site or just my traditional lesson planning pages (below).


UPDATE: (6-29-12)  I totally forgot to post the Lesson Plans Notebook Cover and Spine Label I created for you! Dang it!   Well...here it is... better late than never I guess! :)


Also, I've found another blogger who's offering FREE Lesson Plan Binder Cover Pages.  They are pretty neat! So check 'em out over at  Just Another Day in First Grade.  You can find another really cute set of binder covers for FREE at  A Year of Many First's Blog.  Click HERE for her free binder covers.

What about you?  What is your favorite way to plan your lessons?  Have any freebies to share with your fellow online teacher friends? :)

Tune in tomorrow when I will be sharing my Strategy Grouping Planning Pages with you!


Wishing you the best today,


-------------------------------------

P.S.  Did you know that I started my own company, Camp Partridge?  

⛺️ Camp Partridge offers online camps for children and teens ages 10-16 who want to be digital creators and authors

⛺️ Camp Partridge offers online courses for parents struggling with remote learning

⛺️ Camp Partridge offers resources for your classroom!

I would be honored if you would share Camp Partridge with people you know who need or would enjoy our camps and courses! 🧡


Wednesday, June 20, 2012

Student Number System

My first year of teaching in a classroom, a teacher friend of mine gave me one of the most invaluable tips for classroom management I ever received.  Use a Student Number System.

What is a Student Number System? 
At the beginning of the year, you will assign each student a number.  I usually just type the student's names down alphabetically by last name, and then assign them a number, starting with one.  I had 18 kids last year, so I had student numbers 1-18.

Why use a Student Number System?
Because it makes your life SO much easier! :) Seriously.

On your classroom mailboxes, you can just put the student numbers, 1-whatever, on each mailbox.  That way, next year you won't have to rip off the names and re-do them! You can re-use the same mailboxes and numbers year after year.  Pretty sweet, eh?

Not only can you use classroom numbers on your mailboxes, but also on your text books, writing folders, or anything a student uses for the year and you will re-use again.

Also, it makes field trips a breeze.  Just have students count off starting at one (with you watching to make sure no one says someone else's number) and then you will know if all of your students are on the bus or at the meeting place, etc.

But the main reason why I love using a Student Number System is for organizing student work.  Whenever students turn something in, they will put their number at the top of the page instead of their name.  This way, it is super easy to put them in number order (which is alphabetical order)- even a student could do it!  It also provides anonymity if you have a volunteer grading any of your student's work.

NOTE:  Explain the classroom numbering system to parents before the year starts.  Put the information in your welcome packet or explain it to them at Open House.  They will want to know why their students are using a number instead of writing their name.  Communication with parents is the key to a happy school year!

Here is a picture of my mailboxes from last year.  You can see I just typed the student numbers on some address labels and then put them on each box.  I wish I would have taped over it with a piece of clear packing tape, as some of them started peeling off towards the end of the year.


I also found THIS idea on Pinterest.  I think I will probably use this idea in my future classroom.  However, I will probably use a little bit of Mod-Podge over the numbers to keep them from coming off.  Another idea I had was to paint the clips first, then put a number on it (possibly with a scrapbook sticker) and then Mod-Podge over the whole thing! :) We'll see what happens. :)


In the photo below, you can see my class's writing folders.  I put their student numbers on these as well and the class the next year was able to use the exact same folders with no extra work for me! Yea!


UPDATE:  Over on the Clutter Free Classroom blog, they are talking about the student numbering system! Yea! :)  If you happen to catch this post today (7-2-12), grab her set of numbers FREEBIE which is only free for today.  You will still be able to purchase it from her TPT store if you are reading this at a later date.  Check out her ideas--she has a great blog! :)


I've also found some great FREE number circles that I wanted to share with you-all. The links are below.


FREE Classroom Numbers for your Library Pockets (simply print and then glue on an index card & laminate)


Brightly Colored Class Number Circles

Yellow Stars w/ Red Background Class Number Circles

Zebra & Lime Green Class Number Circles

Dr. Seuss-like Red and Teal Blue Class Number Circles


Do you use a Student Numbering System?  Do you find it helpful?  Thanks for your thoughts and opinions! :)

Have a wonderful day!