Showing posts with label Freebies. Show all posts

Tuesday, December 4, 2012

Opinion Essay Unit

For a class that I took recently with a coworker and friend of mine, we had to come up with a way to incorporate more technology (specifically iPads) into our classroom.  We then had to come up with a final project that uses the iPads.

Of course we decided to go crazy and revamp a unit I had already done and change it into the 7E lesson plan model.  We are a STEM (Science Technology Engineering and Mathmatics) School and our lessons are mainly inquiry-based (that is our goal at this time).  I love inquiry-based learning and have become a big fan of the 7E lesson plan model.  If you are not familiar with it, you can view the framework for a 7E lesson HERE.

So, with that said, my friend and I put together our project.  I thought I would share it with you-all too! :)

This is a 5th grade Unit for an Opinion Essay, aligned to Common Core Standards.  Start with the first link (which is the unit plan) and then you can find all of the handouts and teacher and student examples below.  Thanks for reading! :)

Unit Plan & Printables:

Everything can now be found on my new Teachers Pay Teachers store for FREE!


Wednesday, August 8, 2012

Math Facts Fluency Program {Online Free 1 Year Trial}

Hey everyone! :)

Sorry I've been a little MIA lately.  I finally was able to get into my classroom on Monday!  It is a new school and a new classroom to me...so you know what that means-lots and LOTS of organizing and de-cluttering! (although that is one of my favorite parts about setting up my classroom is the organizing!)

Anywho, I wanted to share with you an opportunity that was shared with me via email.  A company, Explore Learning, sent me an email about an opportunity for teachers to use their Internet-based Math Facts program  for ONE YEAR for FREE!  They have a grant available now for teachers (you must apply before September 30th of this year).  On their website, it says that the cost of the program for one year is $1,625.  So getting this program for one year free is a pretty good deal!

What is the program?
From everything I've read, the program is a game-based Math Facts Fluency program, called Reflex: Math Fact Fluency, that helps students to be able to practice and recall basic math facts in addition, subtraction, multiplication, and division.

It also has an awesome-looking feature for teachers with a break-down of each student's data from each time they've been on the website!

And the other cool thing is that it individualizes instruction for each student automatically based upon a "pre-test" taken by the student at the beginning of each session.

My Thoughts
First of all, I want to say that I have never actually used this site.  All information provided above is meant to be a quick snapshot of what the program offers.  If you are in the least bit interested in what this program has to offer, PLEASE check it out for yourself!  I simply wanted to let you-all know of a FREE opportunity that exists.

I am not a math teacher, however, when I did teach Math last year, I had the stinkin hardest time with my students in 4th grade not knowing their basic math facts.  As any of you know who teach upper grade elementary students, this is a HUGE problem when you are trying to build upon the basic math skills!   If I was teaching math today, I would definitely try this program out!  It looks like it would be fun for students, give me some good data on them (knowing where they need the most help in regards to their basic math facts) and it seems like it would be great practice!   Which is what they need.  I mean, it's FREE, people! What have you got to lose? :)

I also saw on the grant page that if you fulfill the grant requirements, they will let you renew your subscription for one year for $99.  Pretty sweet!  Just make sure before you sign up that there is no fine print about requirements that you have to meet that you won't be able to meet.

If you missed the links above for the grant page and the main website, check out the links below:

Explore Learning Teacher's Grant

Reflex: Math Fact Fluency Overview


What about you?  Have you tried this program in your classroom?


+ -  x  /, 


Friday, August 3, 2012

Absent Students

What do you do when a student is absent from your class?  There are lots of different ways of dealing with this.  Last year, whenever I had a hand out, I would place one on the absent student's desk, and at the end of the day, I would paperclip all of the work together.

That wasn't organized enough for me, so I created a word document that I saved on my computer and would type out any day a student was missing.  This is what it looked like:


(I've uploaded both of the forms onto Google Drive as "Word" forms so that you can save and edit them for your personal use :)

It may sound like a ton of work, but once I had the template created, it was really very simple just to plug in the info for that student.  And if you had two students missing on the same day, I just changed the name at the top of the page and printed another copy.  This way, I had a copy saved in my computer of what the student had to do in case there were any problems with the parents having concerns about what was due.  I also put a line on the bottom of the paper for a parent signature.  The student was responsible for returning this paper with their work so that I knew the parents at least knew what their student's responsibilities were from the days they missed.

After I printed this page out, I would paperclip it to the papers and I would collect any materials that they needed to complete their assignments.

Even though this was an ok system, it wasn't great.  Sometimes papers would get lost or crumpled in their backpacks, or I would accidentally forget to give them one of the things they needed to complete their assignments.

So this year, inspired by the Paper Drop System by Laura Candler, I decided to make a directions/checklist sheet that I will glue on the front of a 9x13 envelope.


(For some reason it wouldn't accept the clip art... so you can download your own clipart for the top of the page.  Also the font I used for the title is called "A Truer Blue" from Kevin and Amanda Fonts.  The other font I used was Century Gothic.)

Then, after gluing this on the envelope, I will laminate the entire envelope to make it more sturdy.  All of their paper, materials and the sheet above will be put into the envelope.  The checklist will show all of the materials needed so that they won't forget any if they are gathering the materials, and so that I won't forget any if I have to gather the materials.  Because the envelope will be laminated, I will use a wet-erase marker to check the supplies on the folder.

I plan on making several so that I will have enough if I have several students out at one time.

How do you handle absent students in your classroom?  Your thoughts & ideas are always appreciated!! :)


-------------------------------------

P.S.  Did you know that I started my own company, Camp Partridge?  

⛺️ Camp Partridge offers online camps for children and teens ages 10-16 who want to be digital creators and authors

⛺️ Camp Partridge offers online courses for parents struggling with remote learning

⛺️ Camp Partridge offers resources for your classroom!

I would be honored if you would share Camp Partridge with people you know who need or would enjoy our camps and courses! 🧡

Tuesday, July 31, 2012

Classroom Jobs

Classroom Jobs are a great way to give your students more responsibility, help them to take ownership in the classroom, and to free you up from easy tasks that take up too much time.  I am totally a fan of classroom jobs!

Last year was the first year I was a classroom teacher- I had never had students in my classroom all day or even for a long enough time period to make classroom jobs worthwhile.  When I was able to use them, however, they rocked!  It was wonderful to have students help me do the jobs that take up so much of our precious time!

So here's what I did: 
I thought of all of the jobs I wanted students to take care of in my classroom.  Then I got some Library Pockets from the local teacher store and created a little chart area under my SMARTboard.  I labeled each Pocket with a specific job title.  Then, I wrote all of my student's names on index cards.  I let them keep their job for one week, then I would rotate all of the cards down the list one spot each, and I had an extra pocket for the extra students who didn't have jobs.  I would pull a card from the front of the extra pocket to put in the very first spot on the list after I'd moved all the cards down one spot.

Looking back on this system, it was ok...it worked fine... but it wasn't GREAT.  So I researched what other teachers did.  I really liked the idea I found on one blog where the teacher had a job for EVERY student.  This way no one feels left out AND it gives them a sense of purpose when everyone is doing a classroom job.

Another thing that didn't work GREAT for me was having to switch out the jobs every week.  You would think that it takes seconds (which it doesn't take long), however, at the end of the week sometimes I would forget or just think I would do it Monday morning.... it kind of became a thorn in my side... and it was annoying.  Several teachers blogs I've read use a Classroom Job Application.  Students apply for the job they want (and add 2 back up choices) and tell WHY they want that job.  Then the teacher decides which student would be best for that job.  The students keep this job for a whole MONTH.  No switching of cards every week- just once a month.  Then the next month they apply again for another job.  I really like this idea because it gives them more choice in the matter and I feel like they would take it more seriously if they actually had a say in what job they got.  If you are doing this type of system with your class, I would suggest having jobs for EVERYONE- just because it would be a whole month before a student could get a job if they didn't have one.

This year I will be teaching 5th Grade Language Arts... so I will see 3 classes of 5th grade instead of just having one class all day.  I still plan to have classroom jobs, but I think I am going to just split the jobs up between the classes.  That means not all students will have jobs.  I am also going to use the Classroom Job application system, and only change out the jobs once a month.  I wish I could have jobs for everyone- but sometimes it just doesn't work out that way.  (I mean, I could probably create jobs for everyone, but I don't want to keep track of 90 jobs!! ;)

Also, instead of just writing names on index cards, this year I am going to use my classroom numbers- I picked up an awesome set from Clutter Free Classroom's Flash Freebie one day... and they rock!! If you have the money, I would definitely suggest getting them!  If not, check out the links below for some other great FREE classroom numbers!

I couldn't find any Classroom Job Applications that I liked for my older students, so I ended up creating one... you can download it for FREE below! :)


**Update  8/25/14- I have uploaded an EDITABLE version of this Classroom Job Application at my Teachers Pay Teachers store.


Below are some awesome links to FREE Classroom Job Applications and Job Posters & Cards for your classroom:

Cute & Customizable Classroom Jobs AND Classroom Job Application  (from A Year of Many Firsts)

Owl Themed Classroom Jobs (from Middle Grades Maven)

Hollywood Themed Classroom Jobs  (from First Grade Parade)

Red & Light Blue Background Classroom Job Labels

Plain Background Classroom Jobs (from What the Teacher Wants)


FREE Classroom Numbers for your Library Pockets (simply print and then glue on an index card & laminate)

Brightly Colored Class Number Circles

Yellow Stars w/ Red Background Class Number Circles

Zebra & Lime Green Class Number Circles

Dr. Seuss-like Red and Teal Blue Class Number Circles


Do you have any tips or suggestions for classroom jobs?  What works in your classroom?

Rawr,


-------------------------------------

P.S.  Did you know that I started my own company, Camp Partridge?  

⛺️ Camp Partridge offers online camps for children and teens ages 10-16 who want to be digital creators and authors

⛺️ Camp Partridge offers online courses for parents struggling with remote learning

⛺️ Camp Partridge offers resources for your classroom!

I would be honored if you would share Camp Partridge with people you know who need or would enjoy our camps and courses! 🧡


Saturday, July 28, 2012

Brain Bucks

One of the blogs I follow, Corkbord Connections, written by the WONDERFUL Laura Candler has a really cool post on "Brain Bucks," which are tickets that are handed out to students for a variety of reasons (such as creative thinking, etc).  I LOVE this idea!  

Check out the post on Brain Bucks HERE.  Grab the FREE copy of her Brain Bucks template HERE.

Hope you are having a wonderful weekend! :) Ashley

Friday, July 27, 2012

Lost Tooth Envelopes

Happy Friday!! Only a few more Fridays of summer left! I have been busy working on stuff for my classroom and I want to share with you one of my new favorite projects I've created!

I've always had the problem of students loosing teeth in my classroom.  It doesn't happen all of the time, but it occasionally does.  Then I have to send them to the nurse to get an envelope so they can take their tooth home.

I dislike the interruption and the fact that the student is missing out on class time.  What if the nurse is busy and can't see my student for a few minutes?  So this year, I've decided to have some "Lost Tooth" envelopes to keep in my classroom in case this situation arises.  (Now, of course I will let them go to the restroom to rinse out their mouth, etc.) But I will no longer have to send them to the nurse to get something to hold their tooth in!

I searched and searched the internet for a "cool" tooth envelope (due to the fact that my kids are in 5th grade), but couldn't find one.... so I decided to make some of my own! :)  I really dig these and think they are pretty cool!! :)  Plus, they are small, so that the older kids can just slip them in their pocket and not have to worry about carrying something around all day.

I am sharing my lost tooth packets with you today! :)  Just click on the link below to grab the freebie!  I also have posted a tutorial below on how to put them together... you may not need it... I just hate following directions and would rather see pictures! :)  Enjoy!


(for some reason when you view the file in Google Docs, some of the envelopes look messed up... but when you download the PDF, they are fine!  I have no idea why they look messed up on Google Docs!)

Tutorial:
Step 1:
Print desired Lost Tooth envelopes & cut out. (Note: Printing the black & white ones on colored paper gives it a little more panache :)


Step 2:
Flip the envelope over and fold all of the tabs toward the back side.

Step 3:
Put one dot of glue on the bottom tab right next to the small right tab (if you are looking at it from the back side).

Step 4:
Fold the small right side tab over the bottom tab and press where you put the dot of glue.

Step 5:  
Put small dots of glue along the bottom and right side tabs. (careful! do not over-glue!)

Step 6:
Press the large left-side tab down onto the dots of glue.   Press and hold for about 20 seconds where all of the glue spots were.


Finished Product: (the picture is poor quality, but it's pretty cool, eh?!)

Names:
I left all of the top tabs of the envelopes blank with no graphics so that you or your students could write their name on it in that space.  That way if the envelope gets lost somewhere in the school, they will know who to send it to! :)  P.S. I plan to tape mine shut after they put in their tooth.


For Younger Students:
If you are afraid of your little ones loosing their tooth envelopes, you might want to put in the tooth, tape it shut and then put a hole punch through the top and attach a piece of yarn so that they can wear it as a necklace.  Just make sure they are a student that can handle that and won't get into trouble or hurt themselves (or someone else) with it ;)


Hope you enjoy these! 

:) Ashley


-------------------------------------

P.S.  Did you know that I started my own company, Camp Partridge?  

⛺️ Camp Partridge offers online camps for children and teens ages 10-16 who want to be digital creators and authors

⛺️ Camp Partridge offers online courses for parents struggling with remote learning

⛺️ Camp Partridge offers resources for your classroom!

I would be honored if you would share Camp Partridge with people you know who need or would enjoy our camps and courses! 🧡


Wednesday, July 18, 2012

Classroom Library {Part 3} Book Check-Out and Return Procedures

Today I want to tell you about my check out and return procedures.... Last year was the first year I had students take home my personal classroom library books.  I never had to have a check-out procedure before and I knew I didn't want to put library pockets and cards in all my books... I felt like that was too tedious of a process and even then, if a student didn't check out a book properly, you wouldn't know who had the book anyway.  Also, I have a pretty large classroom library (about 700+ books) and that would be pretty costly to do that-not to mention time consuming!

So after a little research, I decided to have my students write down what book they were reading on index cards and keeping them in one place in the room (in a pocket chart).  When they were done reading the book, they would put one line through it and then they could check out a new one.  This system was ok....but I wouldn't recommend it.   It didn't flow.

So this year, I've done a LOT of research on other classroom libraries...  I've found some cool stuff that I want to share with you, and then I will share what I plan to use in my classroom.

Cool Stuff I've Found:
Booksource Classroom Organizer
Ok folks.... this is a FREE website that you can use to create a book check out system.  If you have an Iphone, you can scan in the bar codes as well with your phone... and it is FREE.  I am totally going to try this system out when I get the time! :)

BookCat w/ CueCat Scanner
This is an online system where you import all of your book titles and use a scanner (just like an actual library would) to check out books to students!  The upside to this system is that you know exactly who has the book and you can return them using the scanner too.  You will also have a complete list of all of your classroom library books.  The downside is that it does cost money (about $55 for both the program and the scanner) and you will have to spend the time to type in all of your titles.  I would eventually like to go to this system...it seems pretty awesome!

Book Check Out Cards
This teacher from Teaching In Room 6 blog has a free and easy way to manage her checked out books.


My Check-Out Procedure:
Due to the fact that I will have very limited funds to start off my classroom this year and will be new to the school (so I will need to purchase more supplies than usual), I will probably not be able to purchase the BookCat system above.  So, I've found another FREE alternative that will work well and will be easy for me as well.

I like the idea of the Book Check Out Cards in the link above, however, I would rather have an online system.  I found THIS system from the blog, Go Fourth with Mrs. Owens. (She also has a lot of other great ideas on her blog- I definitely recommend checking it out!)  Basically, you use Google Drive (formerly Google Docs) to create an online "form" that your students can fill out any time they check out a book.  Whenever the form is filled out, it automatically goes to a spreadsheet in your Google Docs folder! This way you will know who has which book and when!   Tomorrow I will be doing a more in-depth tutorial (with screen shots) to show you how I modified her idea to more fit my classroom.

But I think that the most important thing, no matter what system you choose to use is to have ONE day where students can "shop" for books.  Have them choose several books on that day and after having checked them out, have them keep those books in a book box or bag somewhere in the room- so they will always know where they are located and they will always have extra books to read during the week so that they can never say "I don't have a book to read," and waste their whole reading time searching for a book.

Also, having ONE shopping time for the class will enable you to help students check out all of the books and to make sure that they are doing the check out process correctly.  (After the first couple of months of training the students how to do this, you could then release that job to another student.)

My Return Procedure:
Last year, I just let the students put the books back when they were finished with them.  A lot of times, this resulted in the books being put back in the wrong places.

So, this year I will have a Book Return Bin.  Basically it will just be a crate or a basket with a label on it.  That way, I can check the books back in (see tomorrow's post).  This way I can be sure that whoever checked it out turned it back in.  I can also see which student was responsible if there was damage to the book.

After I've checked the book back in, then I will put it in another bin marked Ready to Reshelve.   I am going to have one of my classroom jobs be the Classroom Librarian, who will return the books to their correct baskets when they are in the Ready to Reshelve basket.

Update 4-29-13
I have tweaked my book return system.  Now, instead of just having a bin where they return the books, I only allow them to return books on certain days (for me it is Thursdays and Fridays) so I do not have to keep an extra bin cluttering up my room all week long and so that they do not waste class time returning books.

My New and Improved Book Return Procedure:
I had a lot of trouble at first when trying to check in books- I had students put their name on a sticky note and then put their books in a stack on my desk.  Let's just say massive piles of books on my desk and students with giant backpacks knocking these over made for a very stressed out teacher!  

So, I cut some construction paper to index-card size (you could just use index cards- I didn't have any at the time) in 3 different colors (one color for each block I see).  Then I put their names on the cards and laminated them.  


On check-IN day, students take any books they want to return and put them in a ziplock gallon-sized bag with their name card facing out.  Then they put the bag in the return bin.  If they have books too big for the ziplock, they put their name on each book that won't fit with a sticky note.  


Then, whenever I am ready to check them in, I can! No mess, no hassle and it makes the whole process SO much easier! :)

Note:  I keep all of the plastic bags folded in half in a small plastic tub along with the name cards for easy storage.  When I check in books, I will take one student's books out of the plastic bag, fold the bag, delete the rows (see Part 4 of this series on how to delete rows), put the books in the Ready to Reshelve basket and the card back in it's pile.  Then I move on to the next student's books.  It might take 30 minutes or so to do 85 student's books- keep in mind not all students check out books or return books each week.


Here are some FREE labels for your baskets!  Print these labels on colored cardstock and laminate... they work great with any color scheme in any classroom!  Enjoy! :)


Update (8-8-12)  I also found this cute Book Hospital Sign & Book Return sign for free! :) 

I really think that this system will work well for me and for the students.  I am totally excited to use it!  How do you check out books in your classroom?


Thanks for sharing!


-------------------------------------

P.S.  Did you know that I started my own company, Camp Partridge?  

⛺️ Camp Partridge offers online camps for children and teens ages 10-16 who want to be digital creators and authors

⛺️ Camp Partridge offers online courses for parents struggling with remote learning

⛺️ Camp Partridge offers resources for your classroom!

I would be honored if you would share Camp Partridge with people you know who need or would enjoy our camps and courses! 🧡

Tuesday, July 17, 2012

Classroom Library Week {Part 2} How to Organize Your Classroom Library

Good morning everyone! :)

Today I want to talk with you-all about organizing your classroom library.  Please note that there are SO many ways to organize your classroom library-you just have to choose the way that suits you best.  I am going to show you how I organize my classroom library.

Some people like to let their students sort the books into different genres- I am not opposed to this, however, I do not let my students sort the books, I do this at the beginning of the year.  This is for a number of reasons.  First of all, this year I will have 3 different LA classes instead of one...so that means some of my students might not get as much practice with sorting the books into the appropriate genre baskets.  Secondly, when my students walk into my classroom for the first time, I want them to know that I keep things organized and in their place, and I expect my students to do the same.  It also helps me to feel like my room is complete and not disorganized.  Remember, this is just my opinion, and if you choose to do it a different way, that's totally fine :)

How to Sort Your Books
I like to sort my chapter books by genre and my picture books by subject.   I put each genre or subject into its own basket (sometimes it takes more than one basket).  After that, I make a label for each basket and attach it to the front of the basket.


This was my classroom library last year (I was fortunate enough to have a lot of shelf space!).  The sets of books were used for my book clubs and students were not allowed to choose these books.  The picture books on the right hand side are my mentor texts for lessons.  Students are also not allowed to choose these books as most of them are meant to be a cold text (and I want the story to be interesting and special when I read it aloud to them).  But any of the books in the baskets were for students to read.  I've found that putting the books in baskets like this helps keep the books organized and it also gives you a little more space (especially with the chapter books).  It is also easy for a student to pull out one or two of the baskets to look for a book instead of just standing in front of the shelf the whole time.

Book Basket Labels
My book basket labels were nothing fancy- I just took neon index cards and wrote the genre on them.  Then I laminated them, hole punched them in two places on the top and then my wonderful husband put a string through the holes of the card and the holes of the basket and tied it in a knot.  This method worked well and I never had any of the genre cards fall off.

However, they aren't very pretty.  So this year, I decided to change it up!  I found some FREE book basket labels online.  Click HERE to access them.  I'm pretty sure these are the ones I'm going to use this year.  She's included every genre and topic that you'll need... and I like the pictures that go along with them as well!  She suggests printing them on cardstock and then she puts them in a floppy disk protector...but my baskets have holes in them and I don't think they'll stick that well.  So, I found this awesome idea on another website:

She uses binder rings (found at any wal-mart or target) to attach the book labels to the baskets!  (of course laminating the card first).  But how cool is that! So simple, yet so awesome!  If something happened to your label you could just easily replace it! I also think it would allow the card to swing more freely and would hopefully allow the card not to be damaged! :)  The idea came from Teaching in Room 6's blog.  I HIGHLY recommend her blog...so full of SO MANY great ideas! 

If you didn't like the labels above, I found these for free on Teachers Pay Teachers.  I found THESE super cute labels that are also free! And also know that there are many other book basket labels out there... they just aren't free :).  Although, if you've found some great FREE labels, please share the link in a comment below! :)

Genre Stickers
Last year, I had a terrible time with my students forgetting which basket a book belonged in.  So this year, to solve that problem, I am going to have one classroom librarian who will put all of the books away after they have been returned.  (In the next couple of days I will be talking about my check-out and return procedures.)   I am also going to put a small round sticker dot (like a yard-sale sticker dot) on the back of each of my classroom books with a genre code on it.  For example:  if it is a Realistic Fiction book, then the sticker dot on the back of the book will say "RF."  I will also have this same "RF" sticker dot on the book basket label.  This way, the classroom librarian will know exactly which basket to return the book to and will be able to do so quickly.   I am also going to be teaching genres a whole lot more in depth this year as a lot of students seem to have a hard time grasping the concept...

Anywho, that's my classroom library set-up! :) Hope this was helpful!   If you have any great classroom library set-up tips, please leave a comment below! :) Thanks for sharing!


Happy Reading,


P.S.
Ok...while Googling for more book basket label choices for you, I came across this Pinterest Board called Labels.  Check it out for lots of free labels for things in your classroom!  Just thought I would share! :)

Saturday, July 14, 2012

Books, Books and More Books!!

I have to share with you-all my purchase of the day!   My husband and I went to a local small flea market.  We actually just went to look around and not to buy anything.  In fact, I didn't even bring any money with me.

As I was looking through some books at one of the booths, I found one of my most favorite books, Stand Tall Molly Lou Mellon.  It was marked $1.  I asked my husband if he had any money... and he had $2 in cash in his wallet (which he so kindly gave me for books :).  So I found one other book that looked pretty interesting (also marked $1) and I told the lady that I was buying the books for my classroom and asked if she'd take $1 for both.


She said, "Of course...and go ahead and take a few more too."  I was surprised by this because I was just happy she let me have 2 for the price of one!  So I took a few more books (I didn't want her to feel like I was trying to take advantage of her), and then she said, wait a minute- and she dug around in a box underneath a table and pulled out about 15 more books.  She told me that she was just going to donate these since they hadn't sold and that I'd probably know who to give them to if I didn't need them.  Her generosity caught me off guard... it was so awesome and so kind of her!

Then later we stopped by a new thrift store (another of my favorite places to pick up books), and I only had $1 left... books were 50 cents each or 5 for $2.  My husband went to the car and emptied out all the change in our car and we came up with another dollar- so I could get 5 books.  When I was chatting with the owner of the thrift store (while waiting for my husband), I mentioned I was buying books for my classroom- and she said that I could have 10 books for $2 instead of 5.  She also said that anytime I wanted to come back I could have the same deal! (P.S. These titles are great! Check out the greatness below!)


Both of these ladies mentioned that others in the past had donated stuff to them for a good cause and that literacy was very important.  Seriously....anytime you are purchasing something for your classroom, it doesn't hurt to ask if they would take less (because it's for your classroom or your students) or if they can give you any kind of a discount!

In all, I received FORTY-SIX books for only $3!!!!!!!!!!! How stinkin' awesome is that?!?!!?!?  Yeah classroom library! :)  Check out my stash below!


One important note- don't expect everyone to give you a discount.  People can sense when you are being genuine and are asking for a discount or if you feel like you're entitled to one.  I know that we teachers spend  our own money to purchase classroom stuff ALL the time- but keep in mind that these people are trying to make a living by selling you these things.  Don't let that stop you from asking for a discount, just keep in mind not to expect one.  (Also, I try to just slide it casually into the conversation that I am a teacher, purchasing stuff for my classroom...most of the time people give me discounts without me even asking for them!)

Also, I came across this site the other day and while I knew some of these stores gave teachers discounts, I didn't know about all of the discounts!  Check out The Frugal Girls.com to get their list of teacher discounts! (I would also like to add that if you are interested in Adobe products like Photoshop, etc-they give teachers & students MEGA discounts!  And I LOVE Photoshop...I cannot sing its praises enough!)


Hope you have a great day! :)


Thursday, July 12, 2012

Make sure you get the FREE stuff!

I know I posted a few days ago about the Clutter Free Classroom's daily flash freebies for the month of July & August.  If you missed it-I want to make sure you know about all of the awesome goodness going on over on her blog!  EVERY DAY in July & August, she is sharing a tip of how to organize your classroom AND giving away a FREEBIE she designed to help with the orgainzational process.

Let me tell you that these are AWESOME!  I've pretty much downloaded everything she's shared! The only catch is that they are only free for ONE DAY.  You have to visit her blog every day to see what new goodness she is sharing.  Otherwise you will have to purchase the items from her Teachers Pay Teachers Store... which is still not a bad deal for what she has created.  But I want you to get them for free too!  Make sure you visit her blog every day!  The link is below! :)

ClutterFreeClassroom


Happy landings,

Monday, July 9, 2012

Questions to Ask When You are New to a School District

Good afternoon! :)

My last post was about the awesomeness that I got a job! :) I am so excited about it!   However, there are so many things to do and to think of now!

I taught in the same school district for 6 years before, so I knew all of the ins and outs of the district without having to think about it.  So, being new to a school, county & district, I have a TON of questions!  

When I was a brand-new teacher in a new school, I didn't know all of the questions I should ask...and I felt like every single day for the entire first year I was in my school I was constantly asking the office ladies or other teachers a billion questions.  I wish I had known them all to ask before school had started...it would have made my life a whole lot easier!

So, this year, I am going to be prepared and I've already thought of a list of about 100 questions (please don't let this number scare you... most questions are just quick answers) of things that I will need to know before school starts.

I have attached (at the bottom of this post) a copy of my list of questions.  I've tried to organized them into 3 sections:  Questions to Ask the Principal, Questions to Ask the Office Ladies, and Questions to Ask a Mentor Teacher.  This way you are not bombarding one person with 100 questions... and you will get the most accurate info from each person.

It is SO important to find someone to answer your questions BEFORE school starts.  This way you will be prepared and your students will see that you are organized, in charge and you know what's going on.

I know as a new teacher that it can be intimidating to ask your principal and/or mentor teacher questions- but  I am sure they will see it as a good thing- that you are organized and ready to learn how their school runs.  Be bold and confident.  Asking questions will help you to be prepared.

Note:  These may not be all of the questions you will need to ask, this is just a starter list- if you need to, add or remove questions to & from the list where appropriate.

P.S.  I've tried to leave spaces for you to write your answers directly on the pages... hope this helps!   (Also, I would keep the completed question/answer pages somewhere you will remember so you can reference them throughout the year.)


Aloha,

Monday, July 2, 2012

FREE STUFF

I am a fan of FREE STUFF.  We teachers work hard all the time and spend oodles of our own money on our classroom.  So I love it when someone is willing to share awesome free stuff with the rest of us.  (Honestly that's the main reason I started this blog...to share it forward with my fellow colleagues!)

Anywho, down to the FREE STUFF!  The Clutter-Free Classroom's blog will be sharing classroom organization and management tips each weekday during July & August.  And not only that, but they are going to have a FREE download each weekday during July & August as well!  How awesome is that?!?   But, you have to visit their site EACH day... the download will only be free for one day.  After that it will be available for purchase from their TPT store.  

So make sure you check out the Clutter Free Classroom every day in July & August! 
ClutterFreeClassroom


Have a wonderful day! 

Setting Up Grading Expectations

Welp, it's Monday! Only 1 more day till the 4th and 6 more days till my 30th  birthday!!  Ah... but I digress...

Today I want to tell you about something I came up with for my students this year.  Grading has (for me) always been one of those illusive things... I've never really had a good system for myself for grading and I was tired of my students not really knowing how they were being graded.

So this year I was determined to make this something to focus on.  I feel like I have a pretty good system figured out for both me and the students.  I've already explained My Grading System to keep me organized and today I would like to tell you my plan to help my students understand where their grades are coming from.


How Am I Graded In...
I believe that setting up expectations FIRST is the key to success in anything you do.  This is especially true in your classroom.

For my students this year, I've created rubrics for each subject and also a description page that tells my students the type of assignment they will be graded on, then how many points they will receive for a completed, correct assignment.  I am going to print one out for each student (for each subject) and have them glue those papers into the front of their notebooks for that subject.

For example, here is my How Am I Graded in Reading? sheet.  I will have my students glue this page into their notebooks.


This way they will always have that page in front of them.  They will be able to check how much each type of assignment is worth.  Now, it won't be an "out of sight, out of mind" kind of thing with their grades.  If they choose not to do an assignment, they will automatically know how many points they will be losing.


Goal Setting & Tracking 
I've always wanted to do Goal Setting and Tracking with my students, but never found a great system for it.  As I was browsing Laura Candler's website the other day, I found this awesome-looking packet (already created!) on Goal Setting & Tracking.  She offers several of the documents for free, but the main e-booklet is only $6.95.  I am totally planning on ordering it!  Check out her website HERE to find the Goal Setting & Tracking E-Booklet.  On the right-hand side of the page you will see her FREEBIES and it will give you a better idea of what's in the e-book.  I can't wait to try this with my students...I am hoping it will make a difference for all of my students...especially those who are not as motivated.


How do you set up grading expectations in your classroom?  Do you use goal setting with your kiddos?  If so, what does that look like & has it worked?


Take care now, bye bye then,


ps... brownie points to the first person who can name the movie that my sign-off line today!   :)


-------------------------------------

P.S.  Did you know that I started my own company, Camp Partridge?  

⛺️ Camp Partridge offers online camps for children and teens ages 10-16 who want to be digital creators and authors

⛺️ Camp Partridge offers online courses for parents struggling with remote learning

⛺️ Camp Partridge offers resources for your classroom!

I would be honored if you would share Camp Partridge with people you know who need or would enjoy our camps and courses! 🧡

Friday, June 29, 2012

The Paper Drop System

Good afternoon! :)

Today's post also has to do with grading.  When I taught Middle School specials classes, I just used the tray system.  I didn't have many papers to grade and that worked well for me.  So, I thought I would try the same system out with my 4th graders.  ....Let's just say it didn't work out as I had planned!   Here is what my trays looked like:


Looks decently organized, right?  Yeah... this was on a good day.  I labeled each tray with the name of the subject (using a Sharpie and some masking tape).  The problem with this system was, if students turned in more than one assignment to the tray before I collected it, then I had to sort through several assignments work of papers and divide them into their individual assignment piles before I could even grade them!  This took so much longer... and then sometimes you would find a rogue paper that got turned in later in another assignment pile.

Part of my problem was that I did not have a grading system.  Yesterday's post talked about my plan for this year and grading. Check it out HERE if you missed it.  So the last couple of months I've been searching for a different system that would work better and keep me and the students more organized.

The solution?  Laura Candler's Paper Drop System!   I cannot sing the praises of Laura Candler enough!  She is amazing!  You totally have to check out her website.  Seriously.  Don't wait.  Just do it!  She has so many great ideas and freebies for teachers.  She has also written a number of books and has other things for sale at the TPT website.


Basically, you use 9x12 brown clasp envelopes.  She has a free printable page you will glue on the front and back of the envelopes.  Then you laminate the entire envelope.  You will need to create quite a few envelopes.  (I plan on creating enough envelopes to hold an entire week's worth of assignments for each subject.)


When you collect an assignment, you put all the papers in one envelope, (with a wet-erase marker) write the assignment's name on the front and check off any students who haven't turned in their work on the back of the folder.  Close the envelope with the clasp and keep in a place for grading at a later time. This way ALL of the papers from one assignment are in ONE place.  You will know who turned stuff in late, and who is missing each assignment at a quick glance.  How awesome is that?!? I can't wait to use the Paper Drop System in my classroom!  I know it will help me out so much with my grading and organization.  


The best thing about the Paper Drop System is that it is totally FREE! Woot Woot!  I loves me some free stuff!   Click HERE for a free download of her Paper Drop System.


I also found a really cool idea on Pinterest the other day:

On-the-Go Filing

but it is actually from the Better Homes and Gardens Website.

Here's another version of the same thing: http://pinterest.com/pin/167829523584004285/


My Idea:
I am planning on creating one of these to organize my Paper Drop Envelopes.  This way, all of the envelopes will be in one place and will be organized! I think it will work awesome!

How about you?  How do you collect student's papers?  What have you tried that's worked?


For Strength & honor,


Thursday, June 28, 2012

My Grading Plan

Grading has always been one of those things that I wish I could get rid of.... the word "grade" is like a nasty 4-letter word to me.   I don't like grading because I don't feel that it always accurately displays what a student knows about a subject or topic.  I feel that informal assessments such as observations & records and sometimes quizzes are a much more accurate gauge of what a student knows on a topic.  (Just my opinion...)

However, we teachers are required to grade student's work.  We just are.  For the first 5 years I taught specials classes that didn't have a lot of work to grade.  It was SO freakin nice!  Then, I moved to 4th grade.  It was a HUGE difference in the amount of grading I had to do!   I had a system for students to turn in their assignments, however, I didn't have a grading system for myself.  You may not think that's a big deal, but believe me, it is!

Last year, I would simply take a stack of papers out of one of my subject's trays, then grade them and input them into the computer.  It seemed like I could never keep up with everything I needed to keep up with.  So for this year, I came up with a plan.

Note:  For you new teachers reading this, know that you do NOT take a grade everything you assign.  Some things, like homework, is meant to be a further practice of the skills and strategies you've taught them in school.  Last year I took grades on homework, but this year I'm not sure if I will.  Even if I don't take a grade on it, we will still grade it in class, and I will also keep a record of who has completed their homework and who hasn't.  Also, I will be giving a 10 question quiz each Friday in Reading, Writing and Math over what we learned that week.  I will be grading it- but only to see which strategy group I should put them in for the next week- not to just take a grade on it.

My Grading Plan
I will be using the Paper Drop system created by Laura Candler to collect my assignments.  I will talk about this in tomorrow's post.

Using my "Grading Planning Page,"  I will decide to grade 2 assignments each day.  This way I won't get overwhelmed with a billion papers to grade in one night and I will keep up with grading and posting grades online.

I've also taken it a step further.  I am going to grade the same types of things on the same day each week.  I will give the list to my parents at the beginning of the year in my Welcome Packet.  This way they will know what days to look for certain grades online.

Here's my schedule:

(all grades, except the weekly quizzes and math participation grades, are from the previous week's assignments- I am just grading them and recording them.  I do it this way because pretty much everything is due on Friday.  I don't want to grade over the weekend, so I grade during the next week.)

Mondays: 
Math Calendar (Go over and grade in class.  I will record scores in class) 
Input Book Club Rubric Sheet Grades into the computer.

Tuesdays:
Writing Independent Practice Activities
Revision Activities

Wednesdays:
Social Studies Centers Rubric Sheets

Thursdays:
Science Centers Rubric Sheets

Fridays: 
All Weekly Quizzes FROM THIS WEEK (Reading, Writing and Math)  --Note that the computer grades them, I just record them.
Math Homework sheet from this week (Go over and Grade in Class.  I will record Monday).
Record THIS WEEK'S Math Participation Grades from Math Participation Grades Sheet.

Notes: 
**Use the Book Club Rubric Sheet at each book club meeting.  After the meeting, have students leave their meeting checklist sheet and/or notebooks if necessary for me to grade.  Record grades on the Book Club Rubric Sheet.**

**Use the Math Participation Small Group Rubric Sheet at each small group meeting during Math.  After the meeting, record their participation grade for the day.  Use that sheet for grades on Friday.**


Does this make sense?  Basically, choose 2 things to grade each day Monday-Friday and you shouldn't have to grade over the weekend.  It will also keep you on track for grading your assignments in a timely manner and getting the grades on the internet for parents and students to see. 

Below I am going to attach my Book Club Rubric Sheet and my Math Small Group Rubric Sheet.  I will discuss in a later post how I do book club and math small groups- however, if you already do either of these you can just snag the rubric sheets below.  

NOTE: The rubric on each sheet is on the second page of both the Math and Book Club Rubric Sheets.  (copy these double-sided)


Carpe diem,


-------------------------------------

P.S.  Did you know that I started my own company, Camp Partridge?  

⛺️ Camp Partridge offers online camps for children and teens ages 10-16 who want to be digital creators and authors

⛺️ Camp Partridge offers online courses for parents struggling with remote learning

⛺️ Camp Partridge offers resources for your classroom!

I would be honored if you would share Camp Partridge with people you know who need or would enjoy our camps and courses! 🧡


Wednesday, June 27, 2012

Creating a Grade Book

Howdy everyone!

So today I am going to talk about the dread wonder that are Grade Books!  Yea!! Ok...so I am trying to put a positive spin on something that a lot of us dread... grading.  I am going to share what I did in my classroom, and how I plan to modify that this year in my classroom.

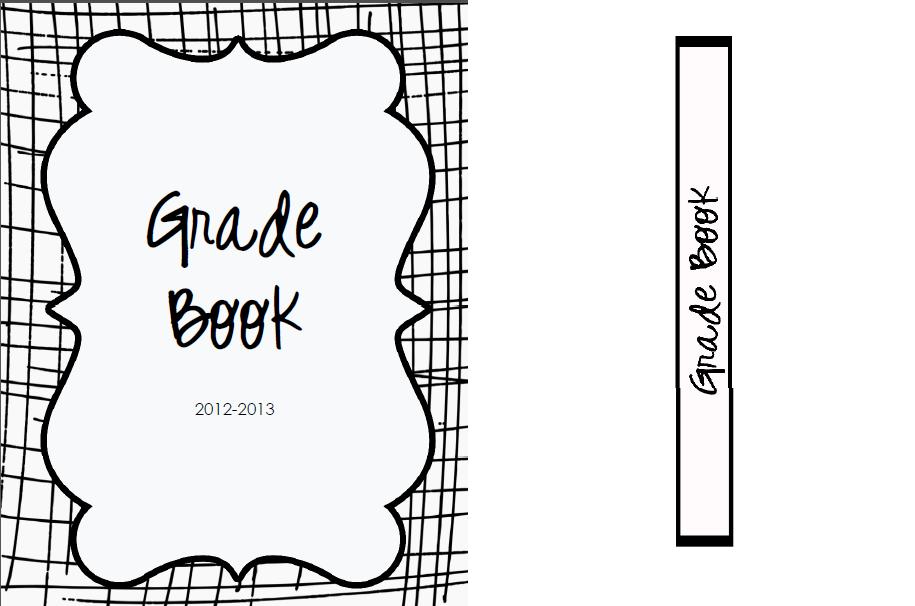
At the end of this post, I will also give you a FREE Binder Cover page and Spine Label for your own Grade Book Binder. Woot!

What I've Used
The school I taught in for 6 years always had an online Grade Book where parents and students could access it 24/7.  I think this is a cool feature because it helps parents to be able to see how their students are performing, if they've missed an assignment, etc.

The only problem with online grade books is- what happens if there is a glitch in the system and all of your grades get lost?  I seriously don't even want to think about that!  All your hard work of grading those assignments, all of the hours you spent putting those grades online, and all of the hours your students spent doing those assignments- just gone.  Completely wiped out.

Now, the reality is, more than likely your online grade book system will always work just fine and nothing will happen to your grades.  However, can you be 100% sure that nothing will happen to your program? Nope.  No one can.

So my solution to this was to print each subject's grades EVERY time after I imported them into the computer.  This may seem a little overkill, but I wanted to make sure that I didn't miss anything!   (For those of you trying to save paper, I totally get it- I am a fan of trees and I try to do as much paperless as I can- however, my grade book is one area that I use more paper than I like to.  But I feel it is important for me to use a little more paper in this area to make sure that my grades are recorded somewhere else.  I probably don't use more paper than a traditional grade book from a teacher store even printing out my grades each week.)

Creating the Grade Book
I am a HUGE fan of 3-ring binders! Everything I have is organized in 3-ring binders.  It keeps everything in order and I can easily find it.

First, print off the Binder Cover and Spine Label from the end of this post.  Put them in your chosen binder.

Next, buy as many Tab Dividers as you have subjects.  Label each tab with a different subject name.

Thirdly, when you print out your grades, hole punch them and put them behind the designated tab for that subject.

Note:  I always put my newest grades on top of the old grades.


So that's it! Pretty easy, eh?  No need to write grades down, then transfer them to the computer.  Just input them, print and put them in your Grade Book Binder.  Sweet, eh?


Tomorrow I will be talking about my Grading Plan for the upcoming year and there will be a FREE Grading Plan template to download!

Live long and prosper,


-------------------------------------

P.S.  Did you know that I started my own company, Camp Partridge?  

⛺️ Camp Partridge offers online camps for children and teens ages 10-16 who want to be digital creators and authors

⛺️ Camp Partridge offers online courses for parents struggling with remote learning

⛺️ Camp Partridge offers resources for your classroom!

I would be honored if you would share Camp Partridge with people you know who need or would enjoy our camps and courses! 🧡